AP Auto Location​​

Automatically locate Access Points on a Digital Map and place them on a floor plan for improved accuracy and simplified deployment​

Use Cases & Value

Your IT teams no longer need to spend hours manually locating Access Points and placing them on maps. With AP Auto Location you can automatically locate Access Points on a Digital Map in Cisco Spaces. By improving device location accuracy and reducing troubleshooting efforts caused by incorrect AP placement, AP Auto Location helps streamline deployments, reduce complexity, save time, and minimize costs associated with verifying and placing APs on maps.​

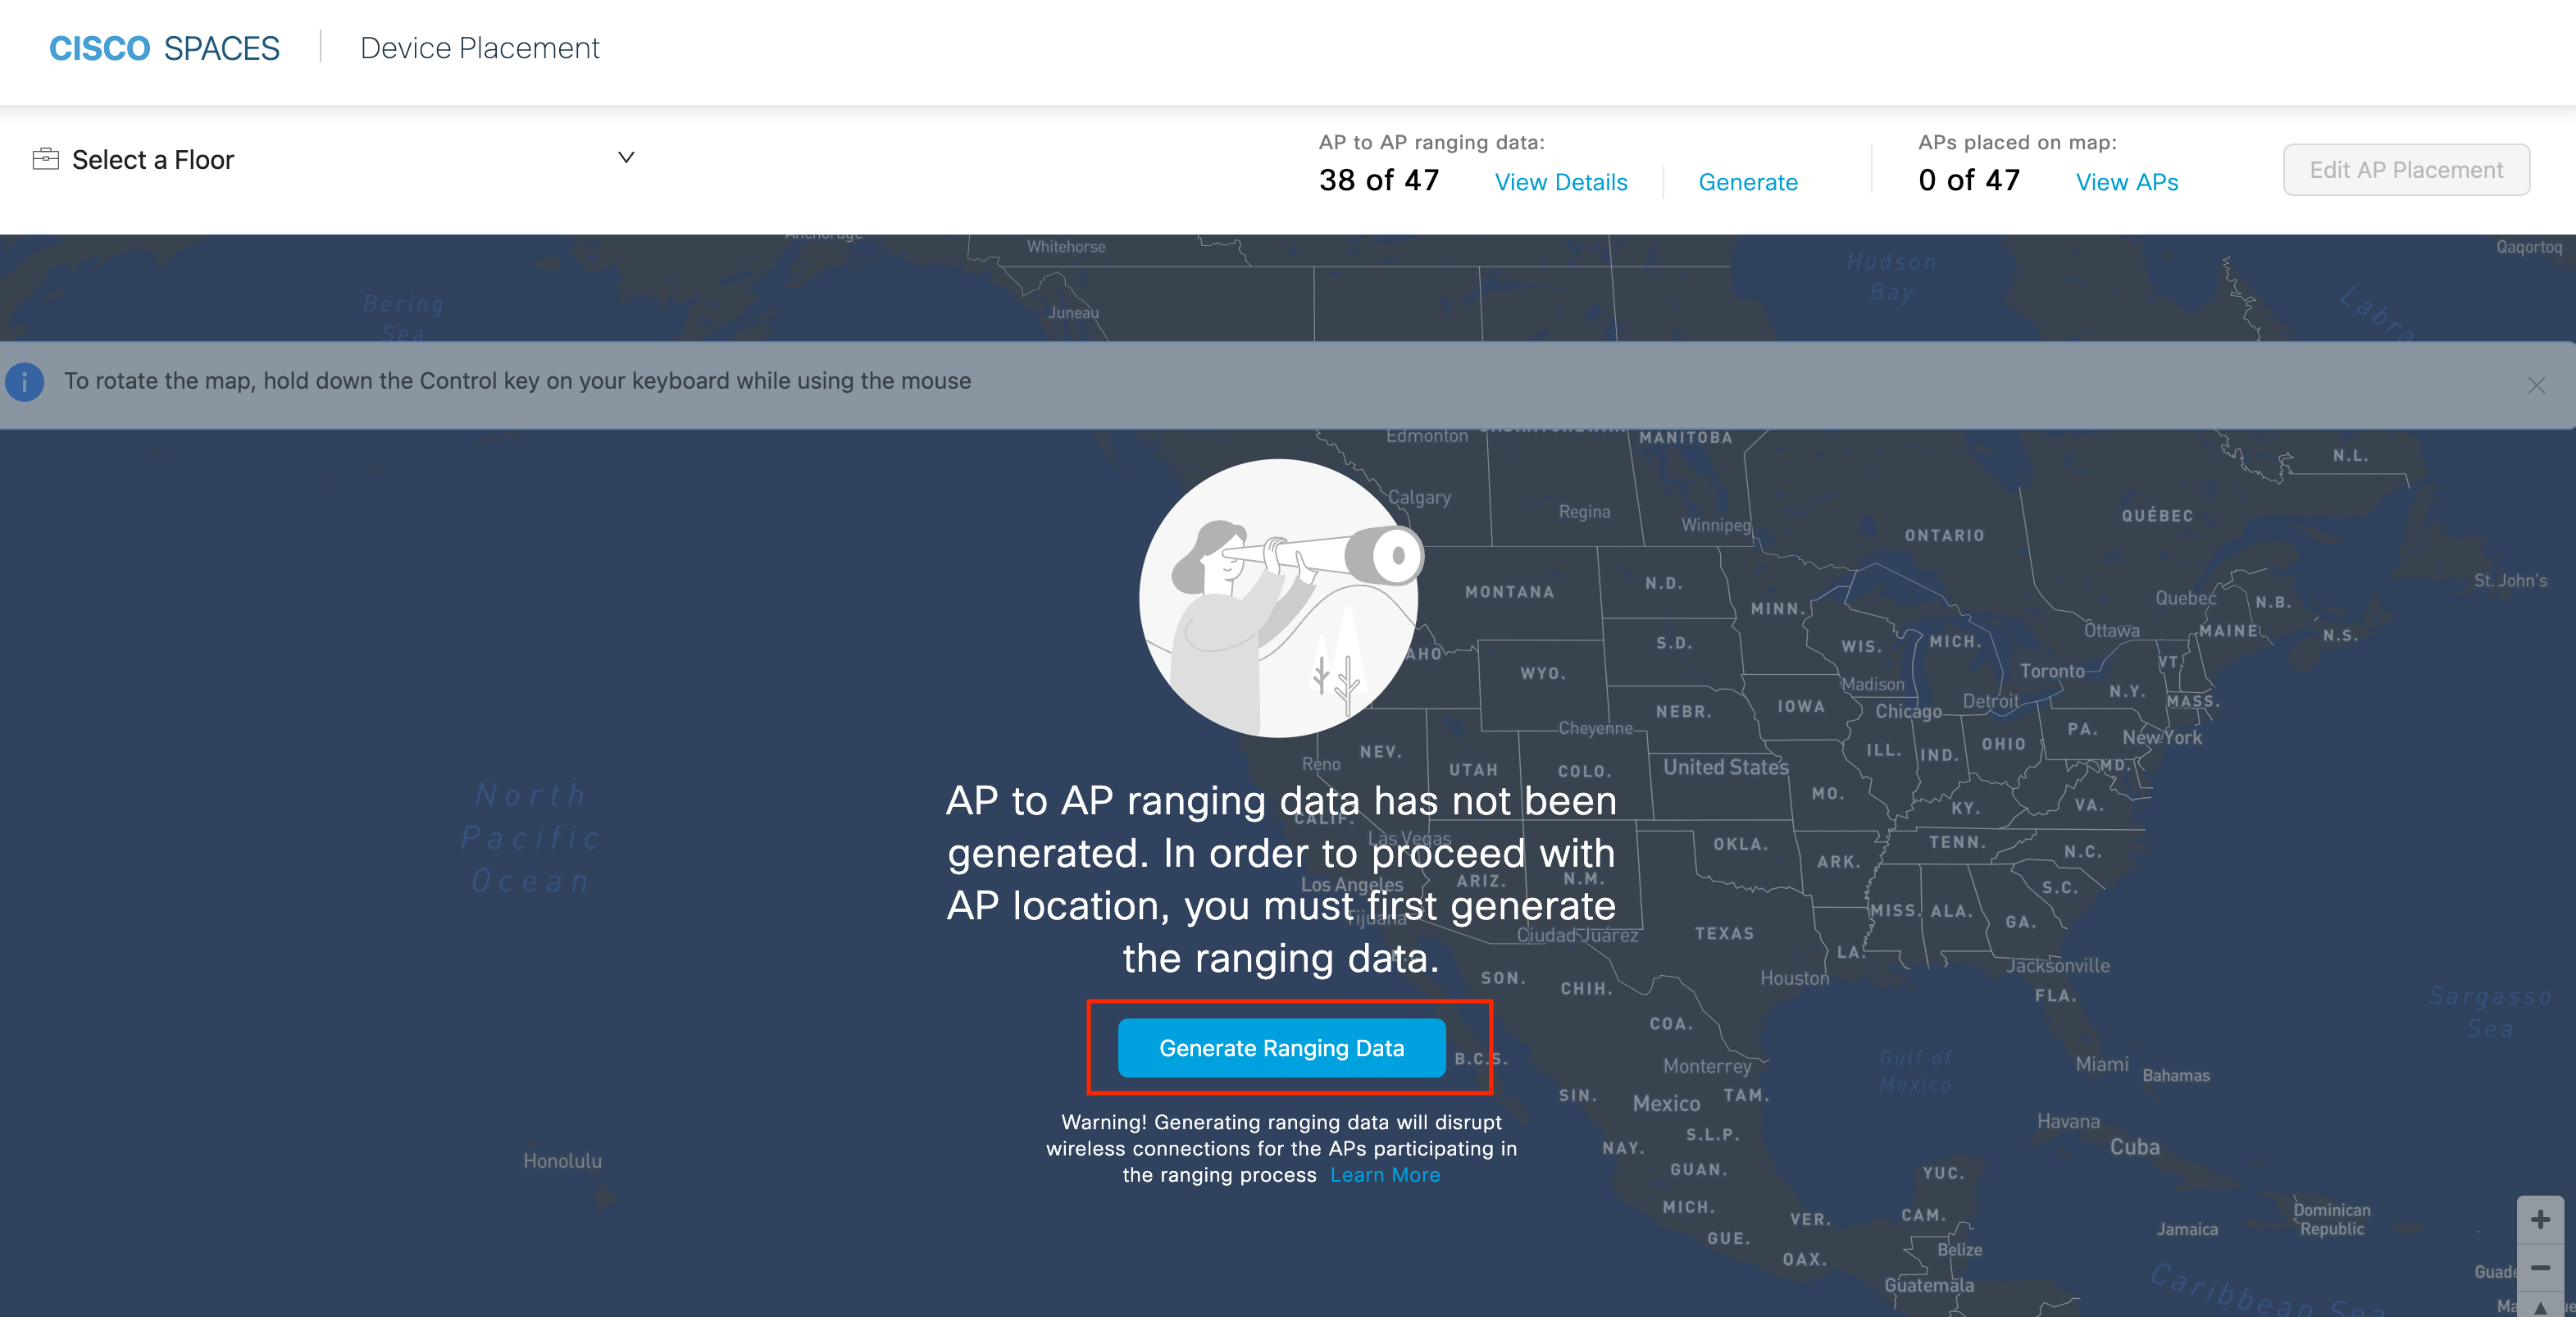
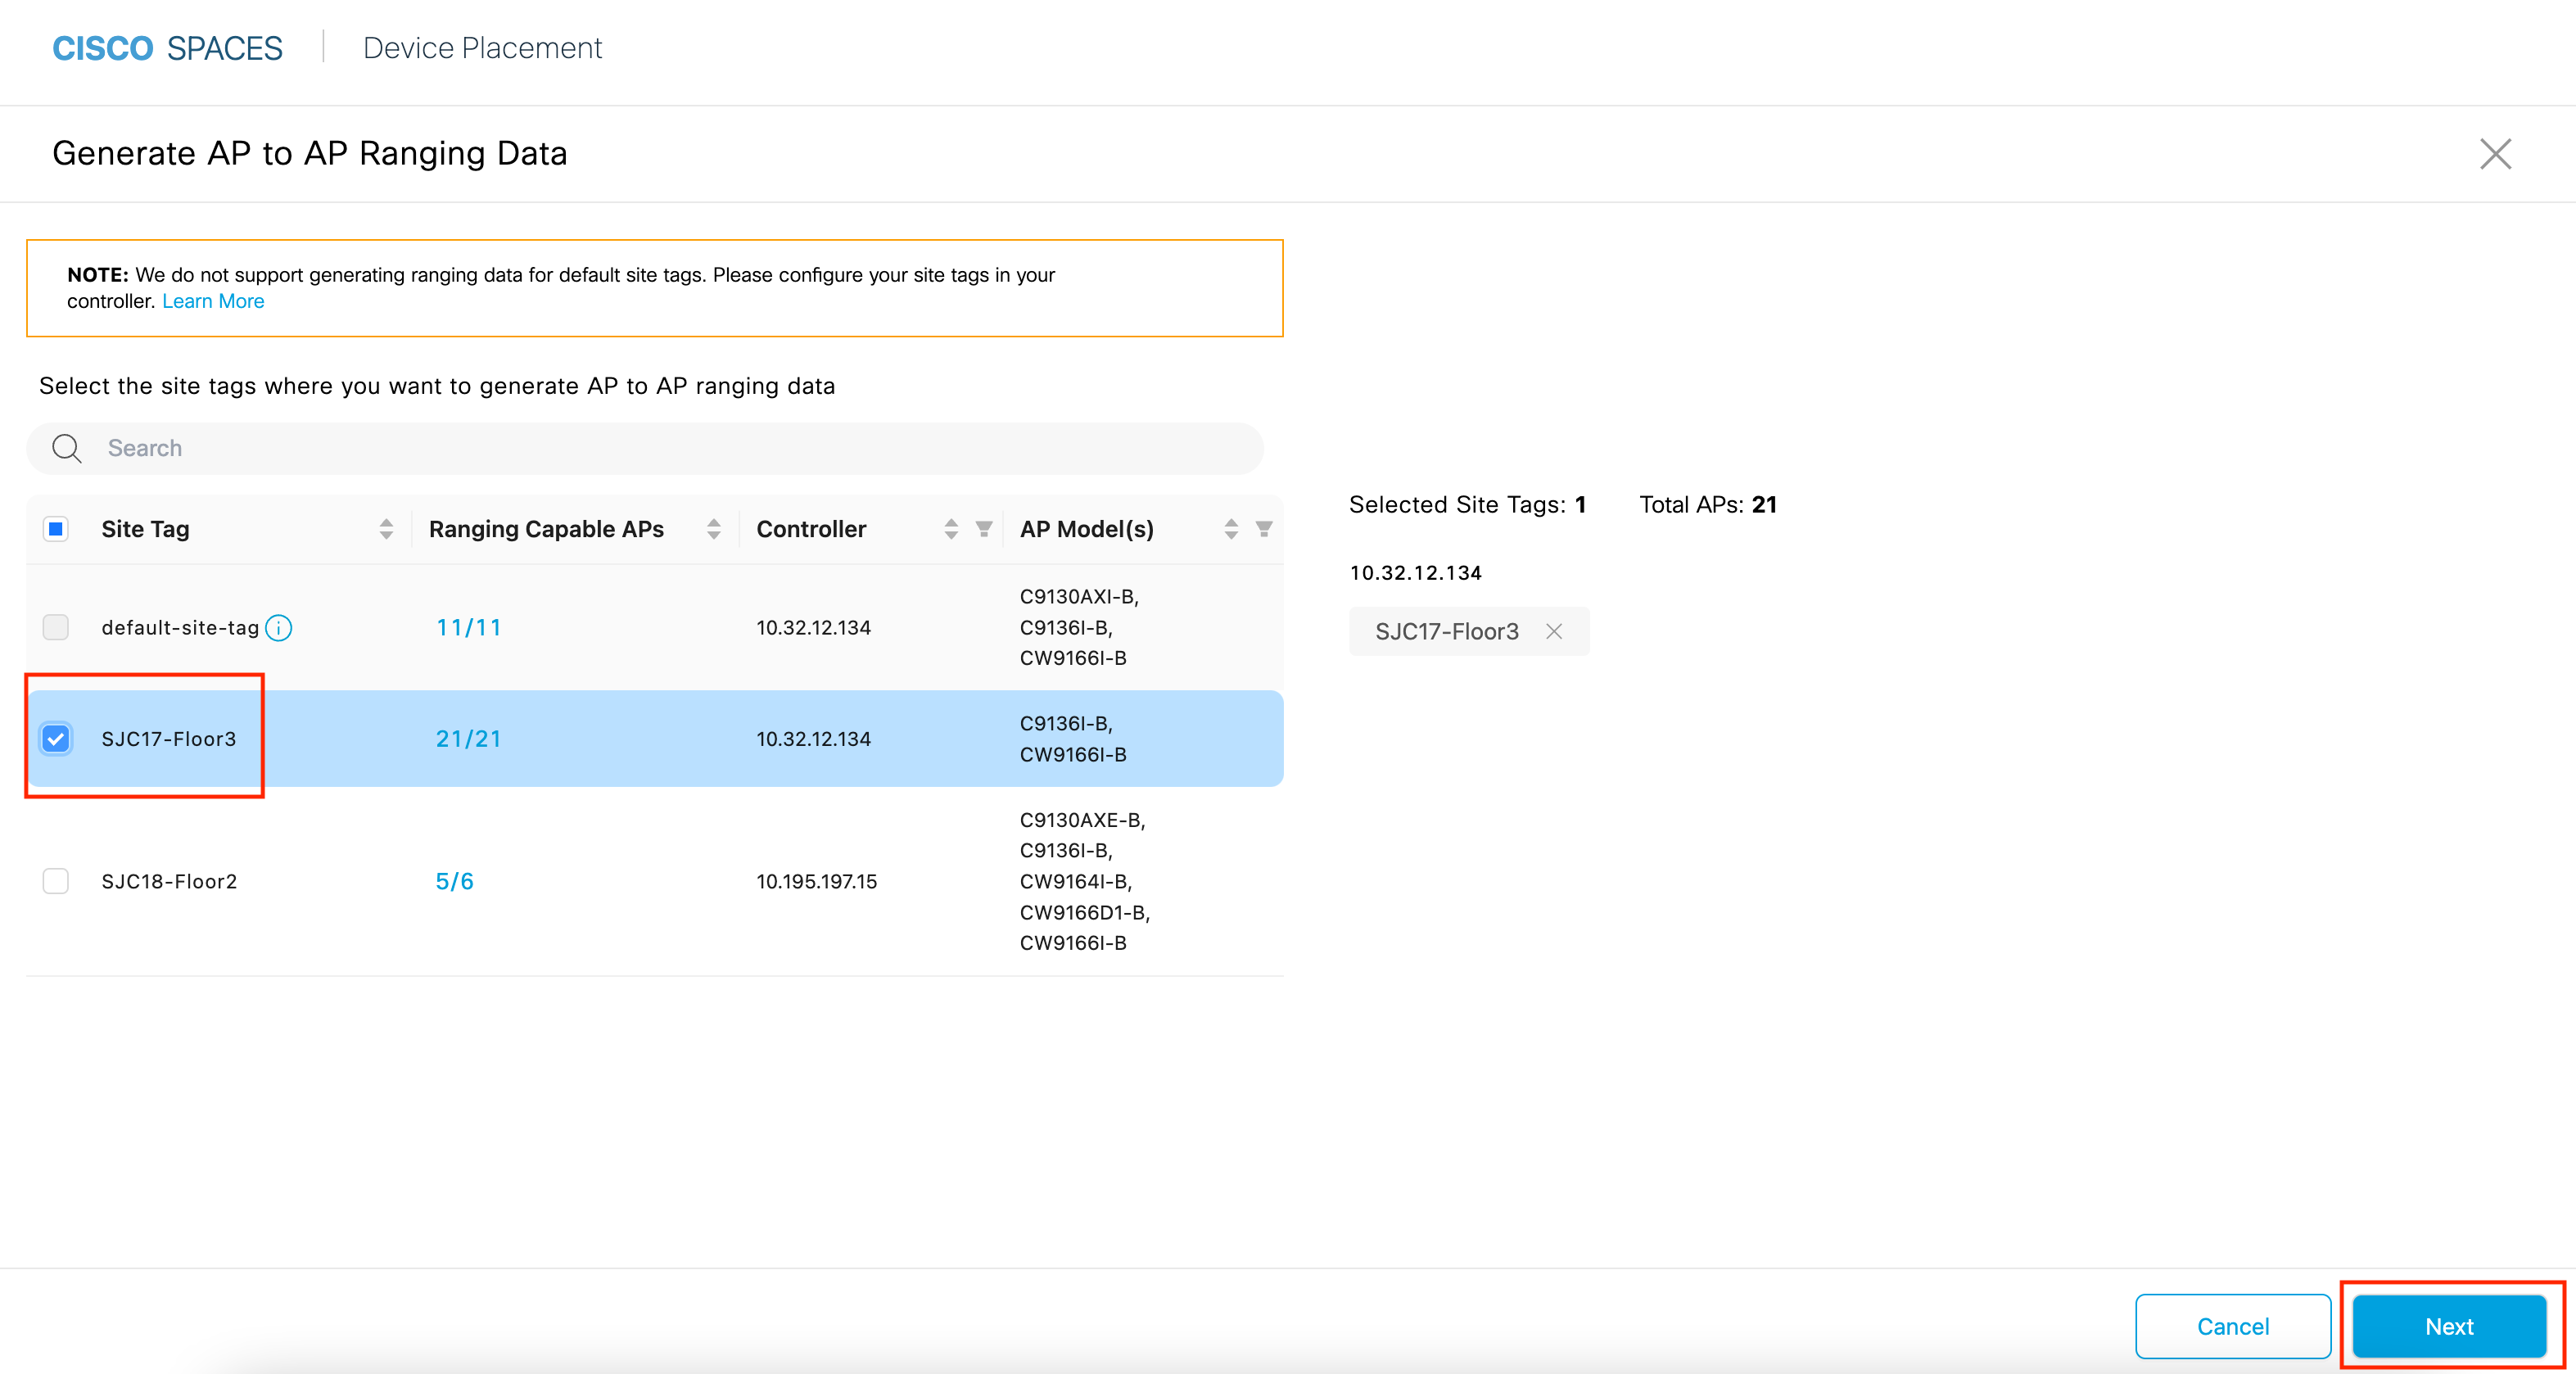
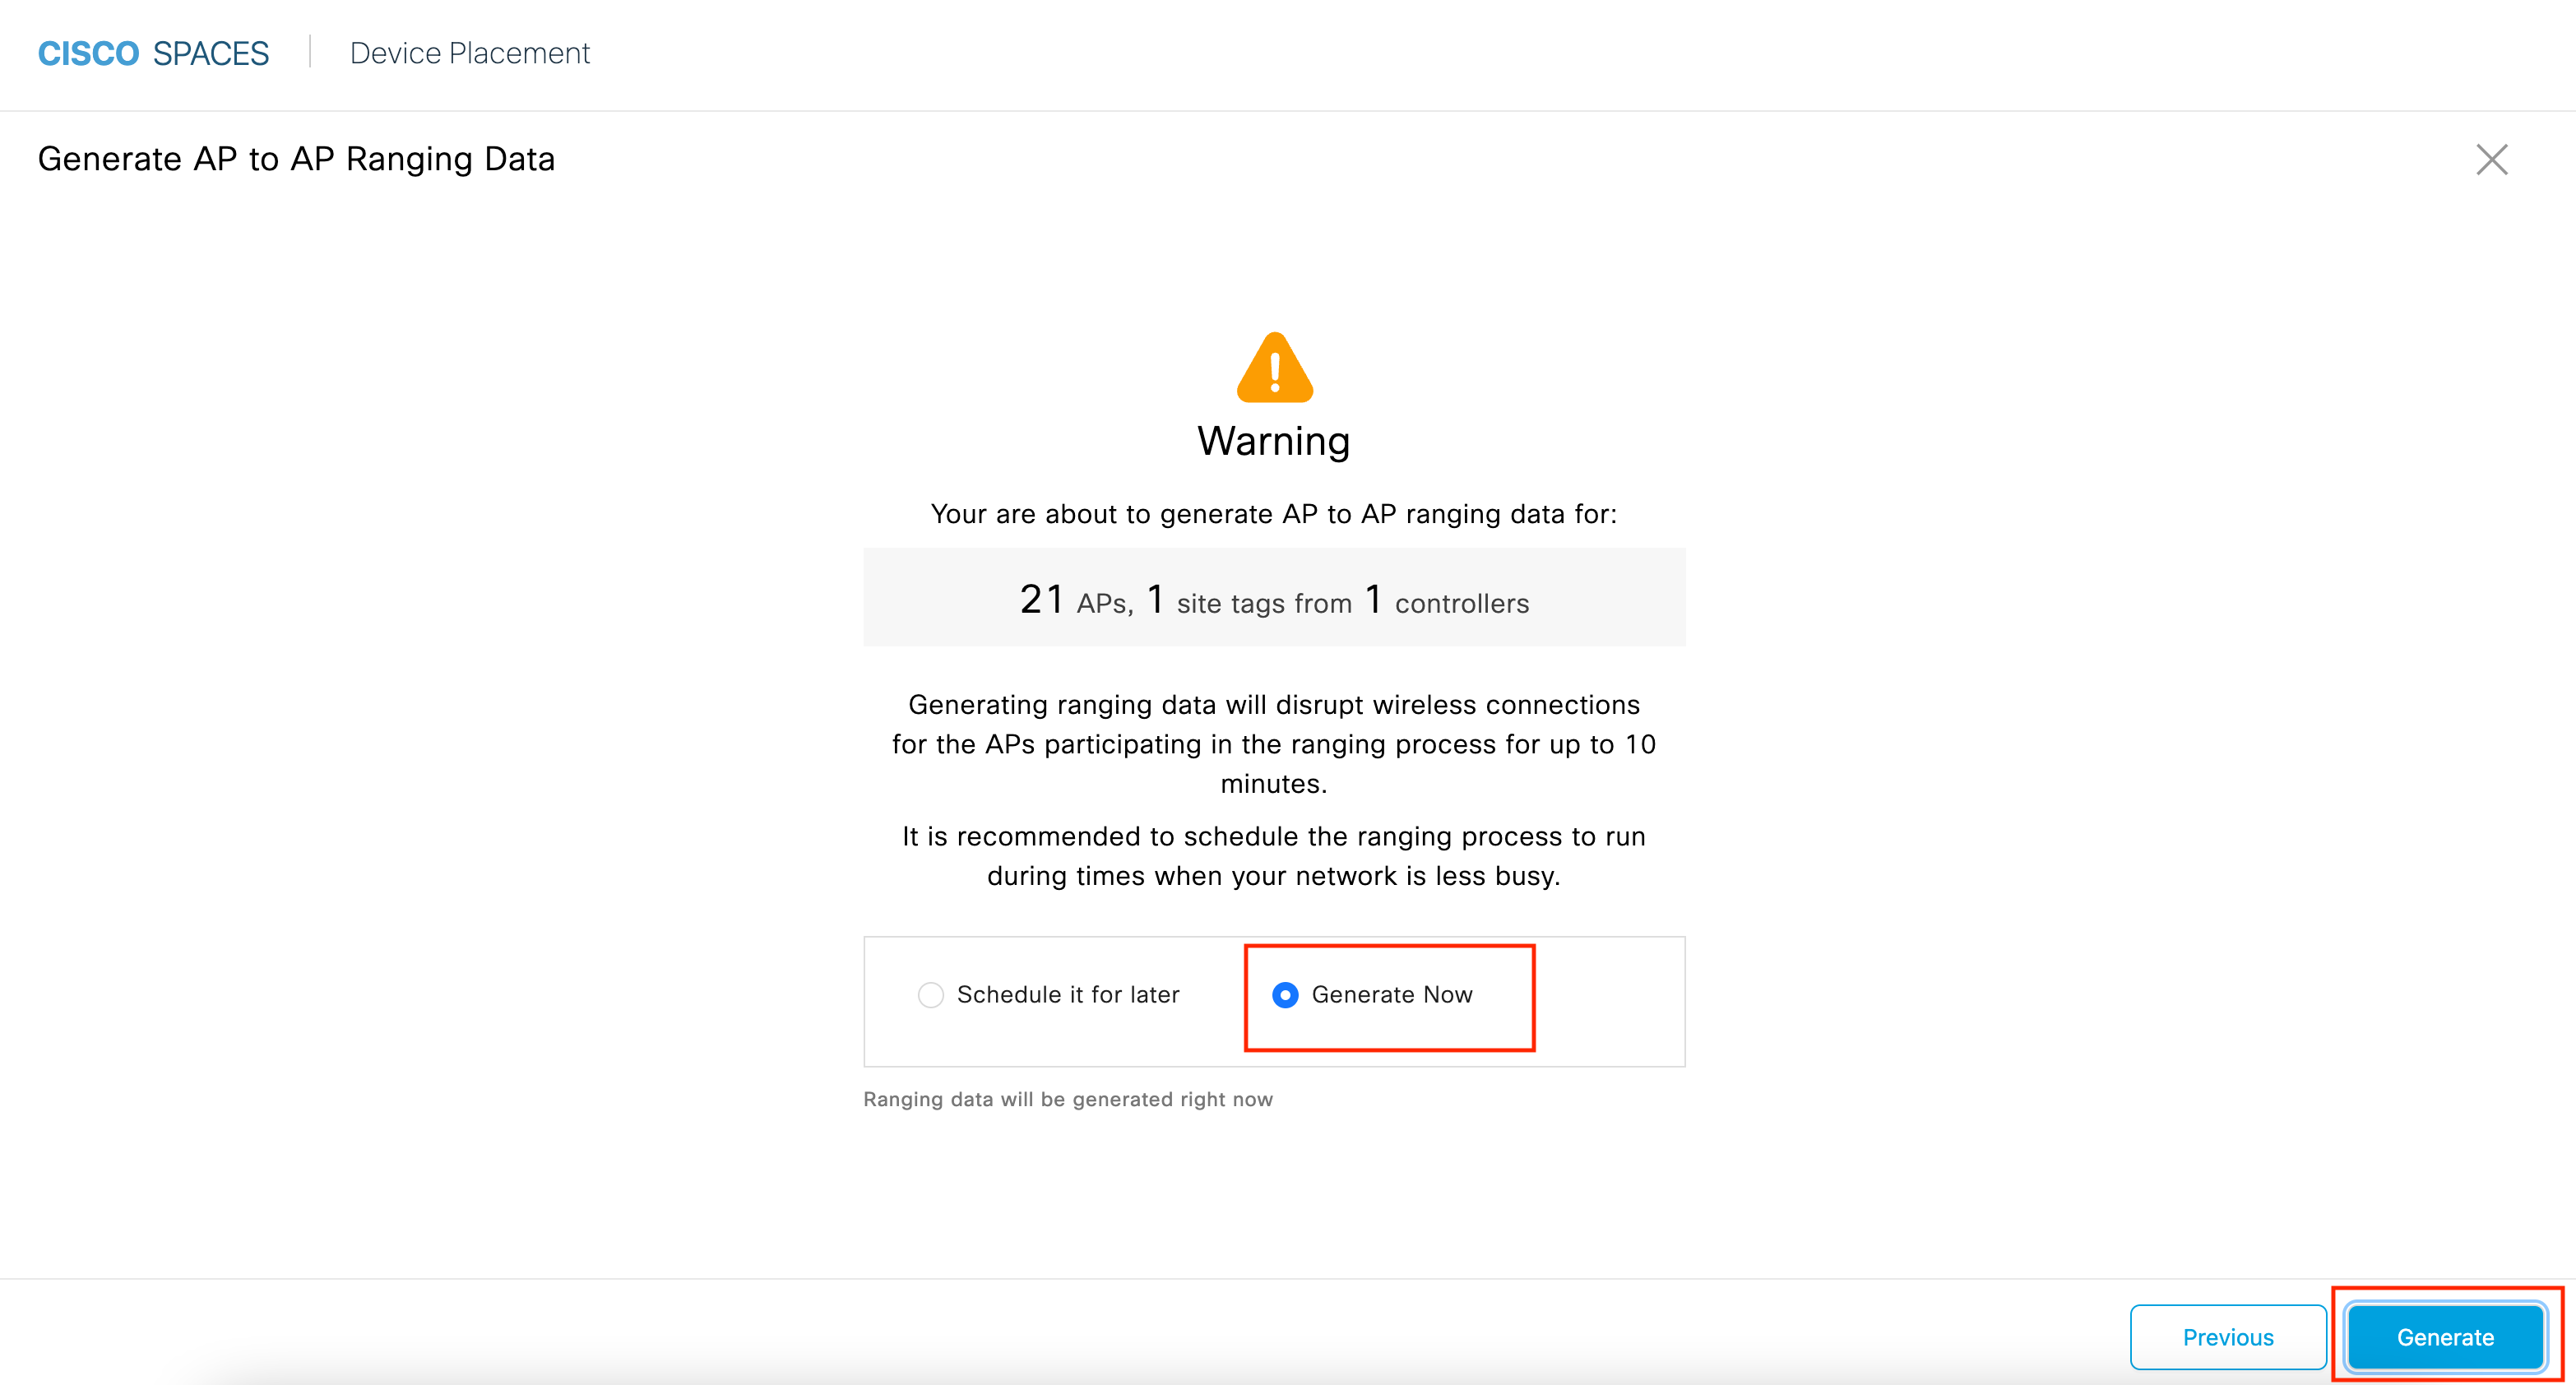
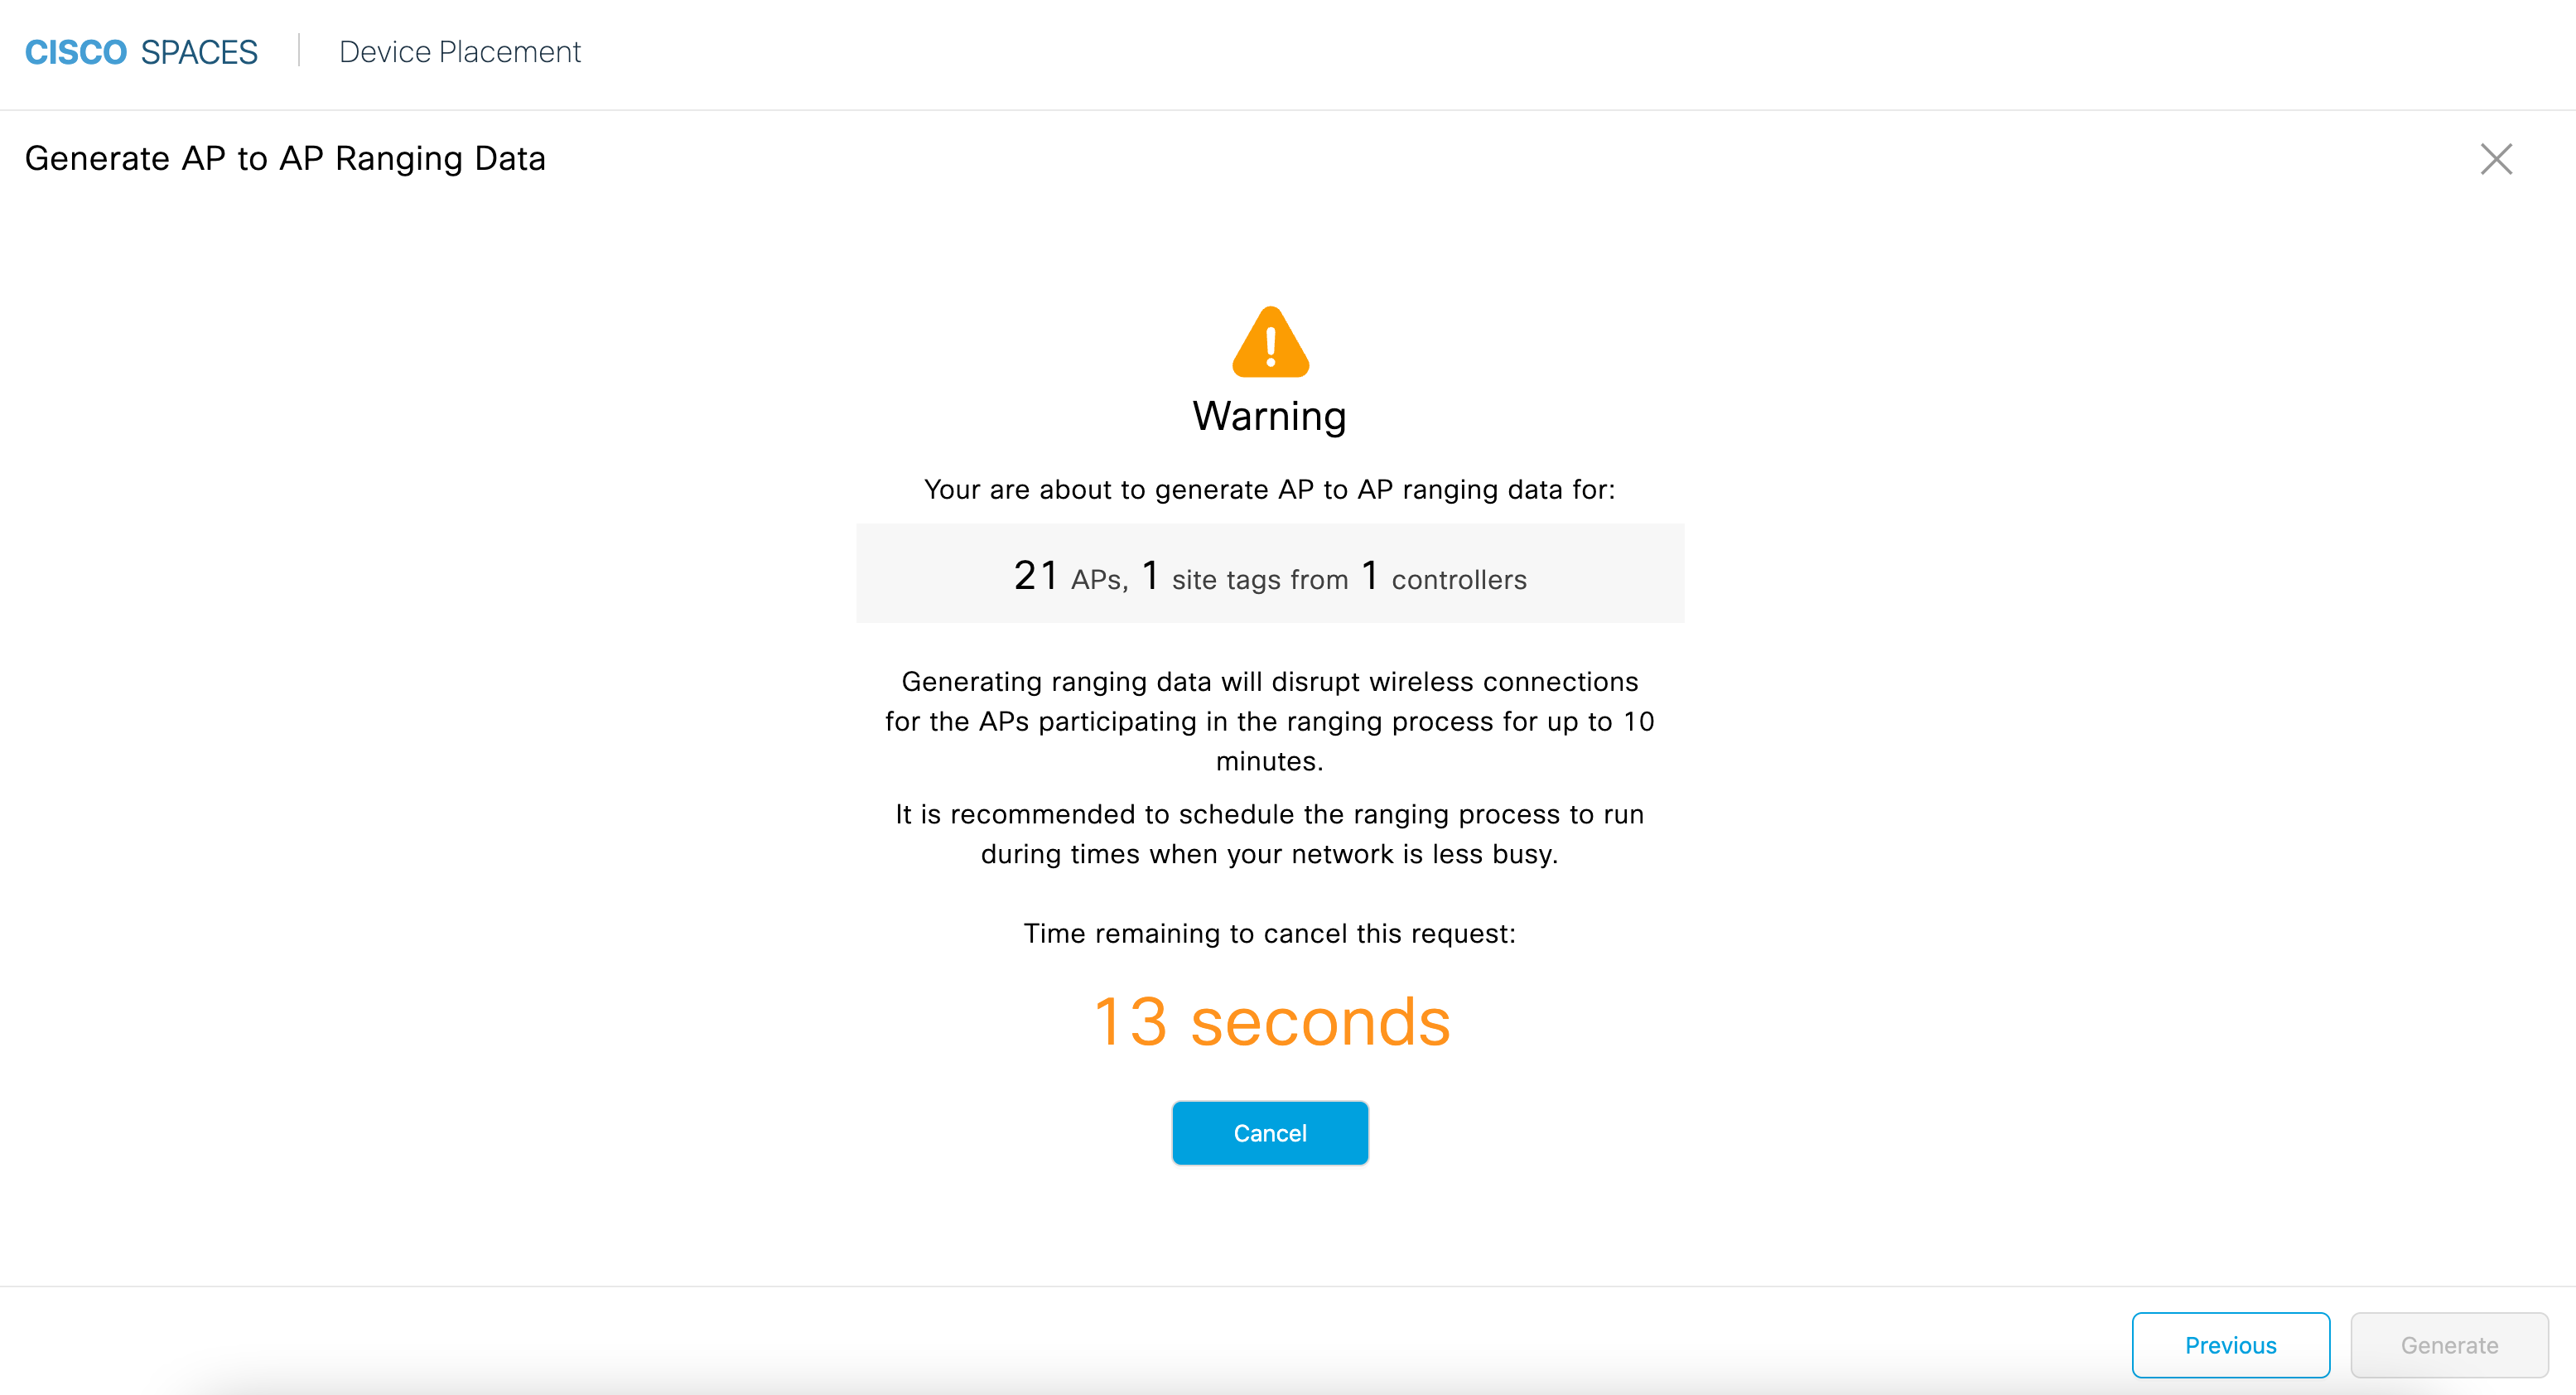
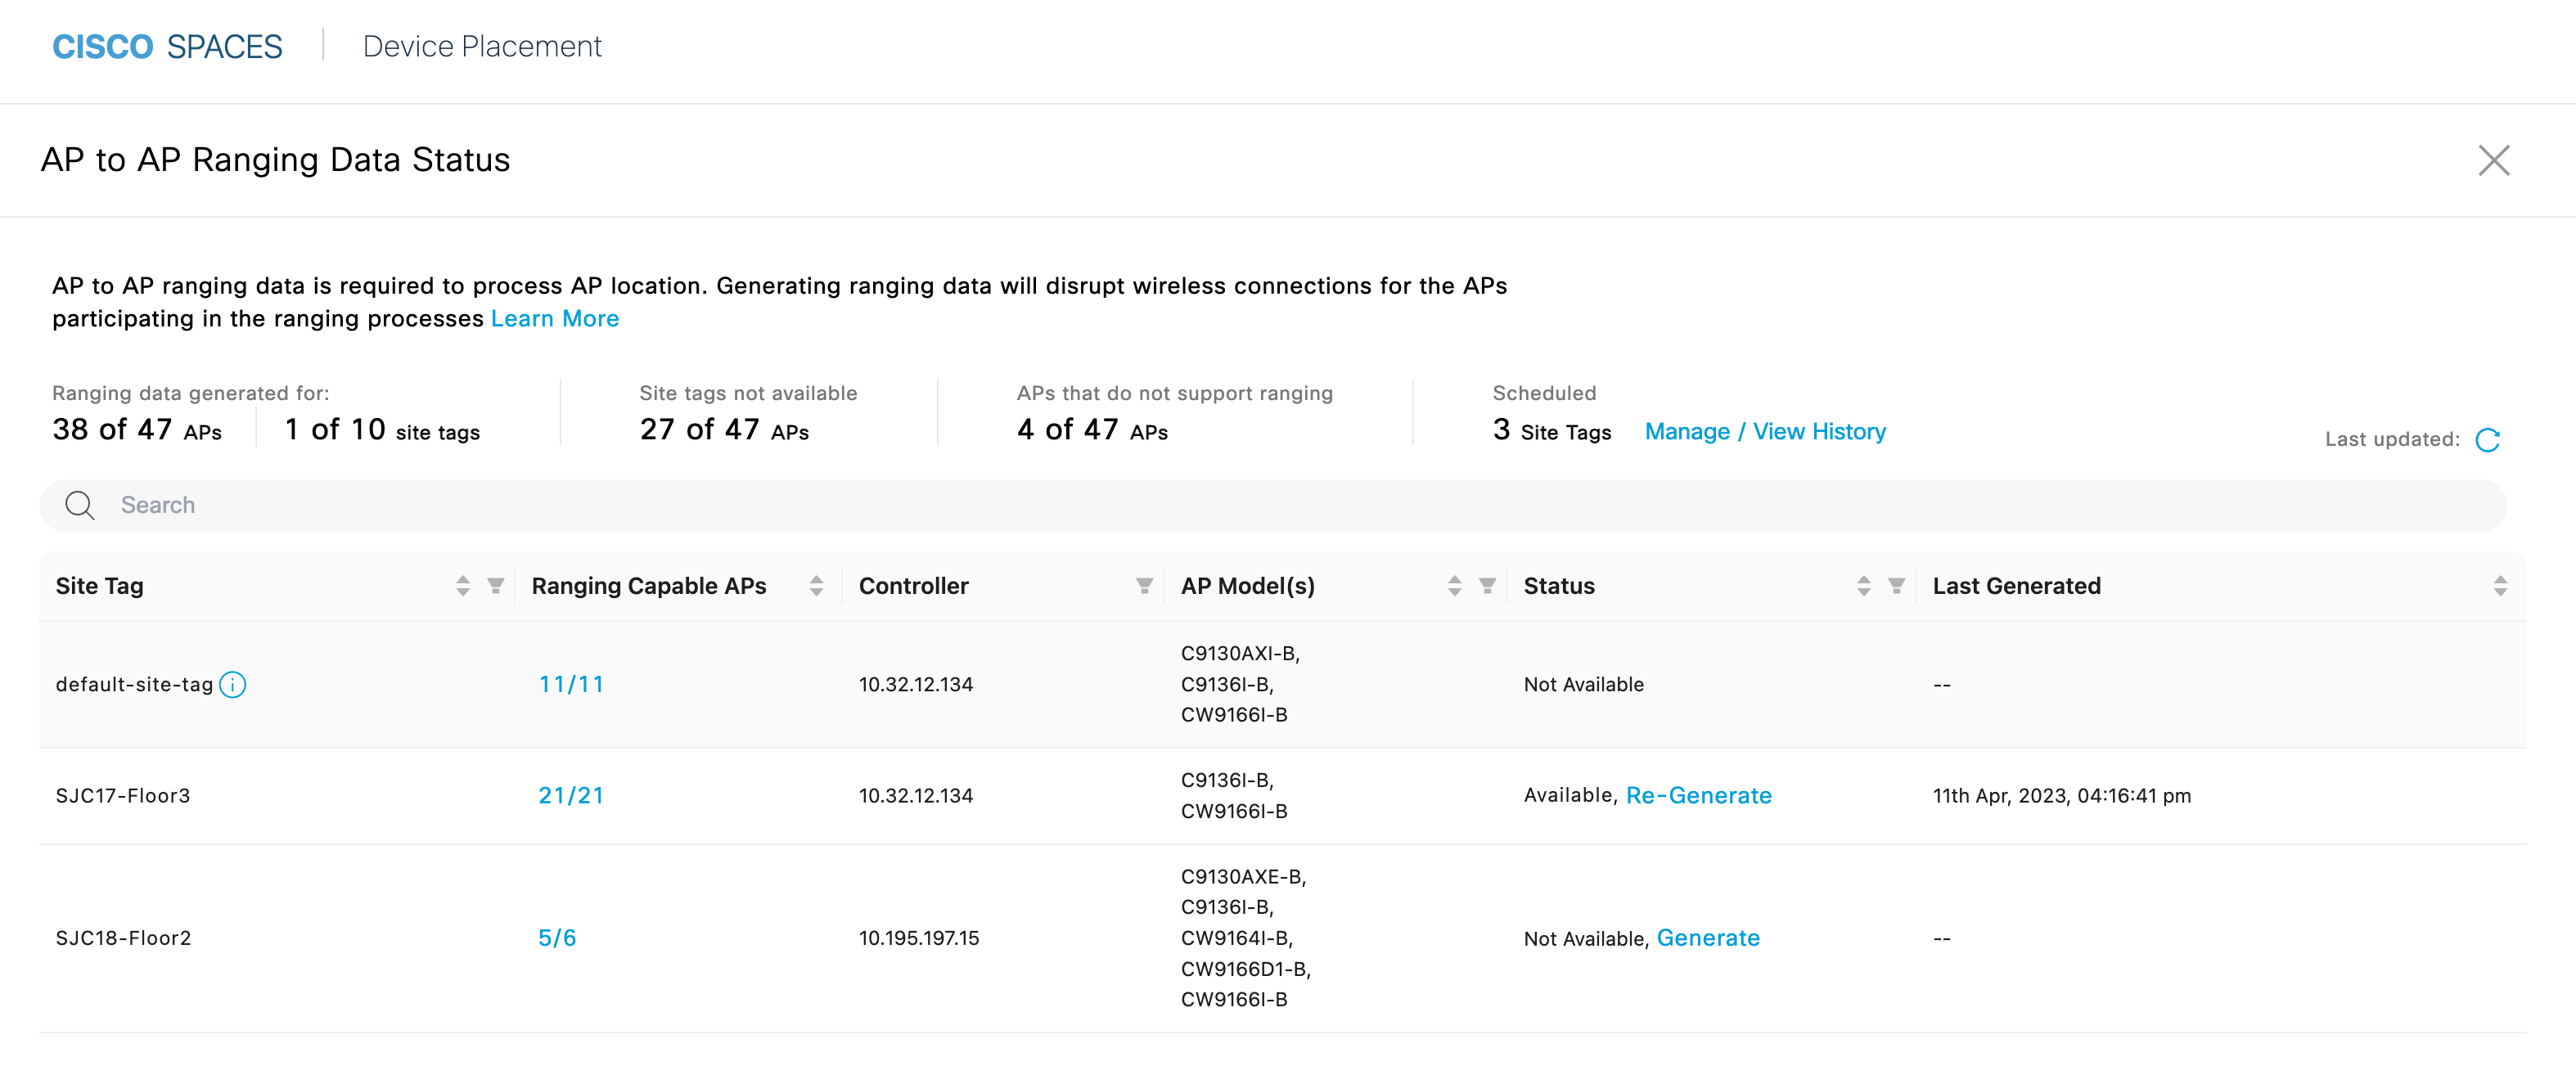
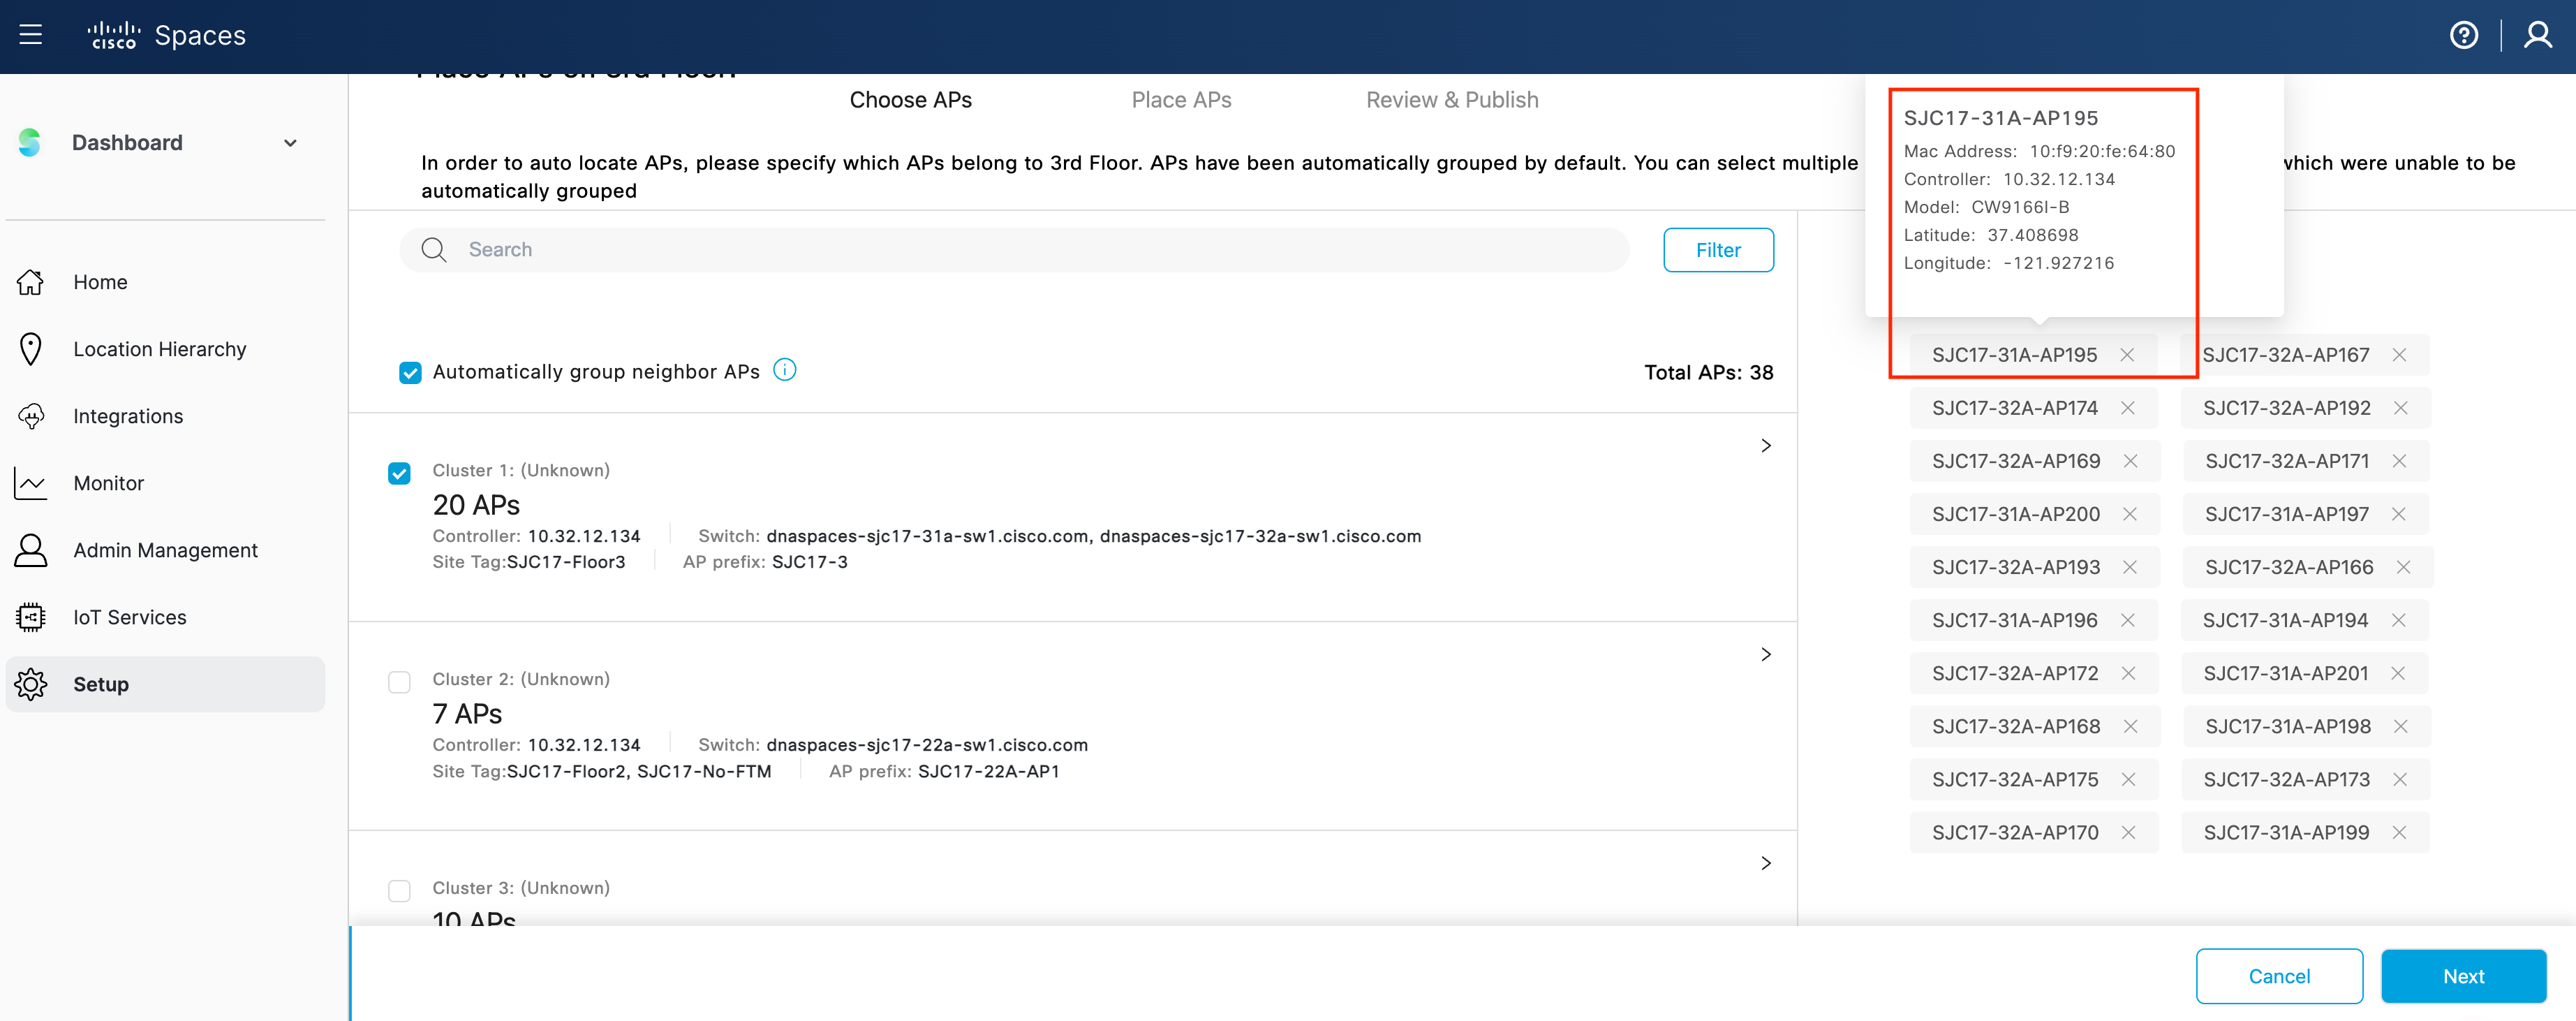
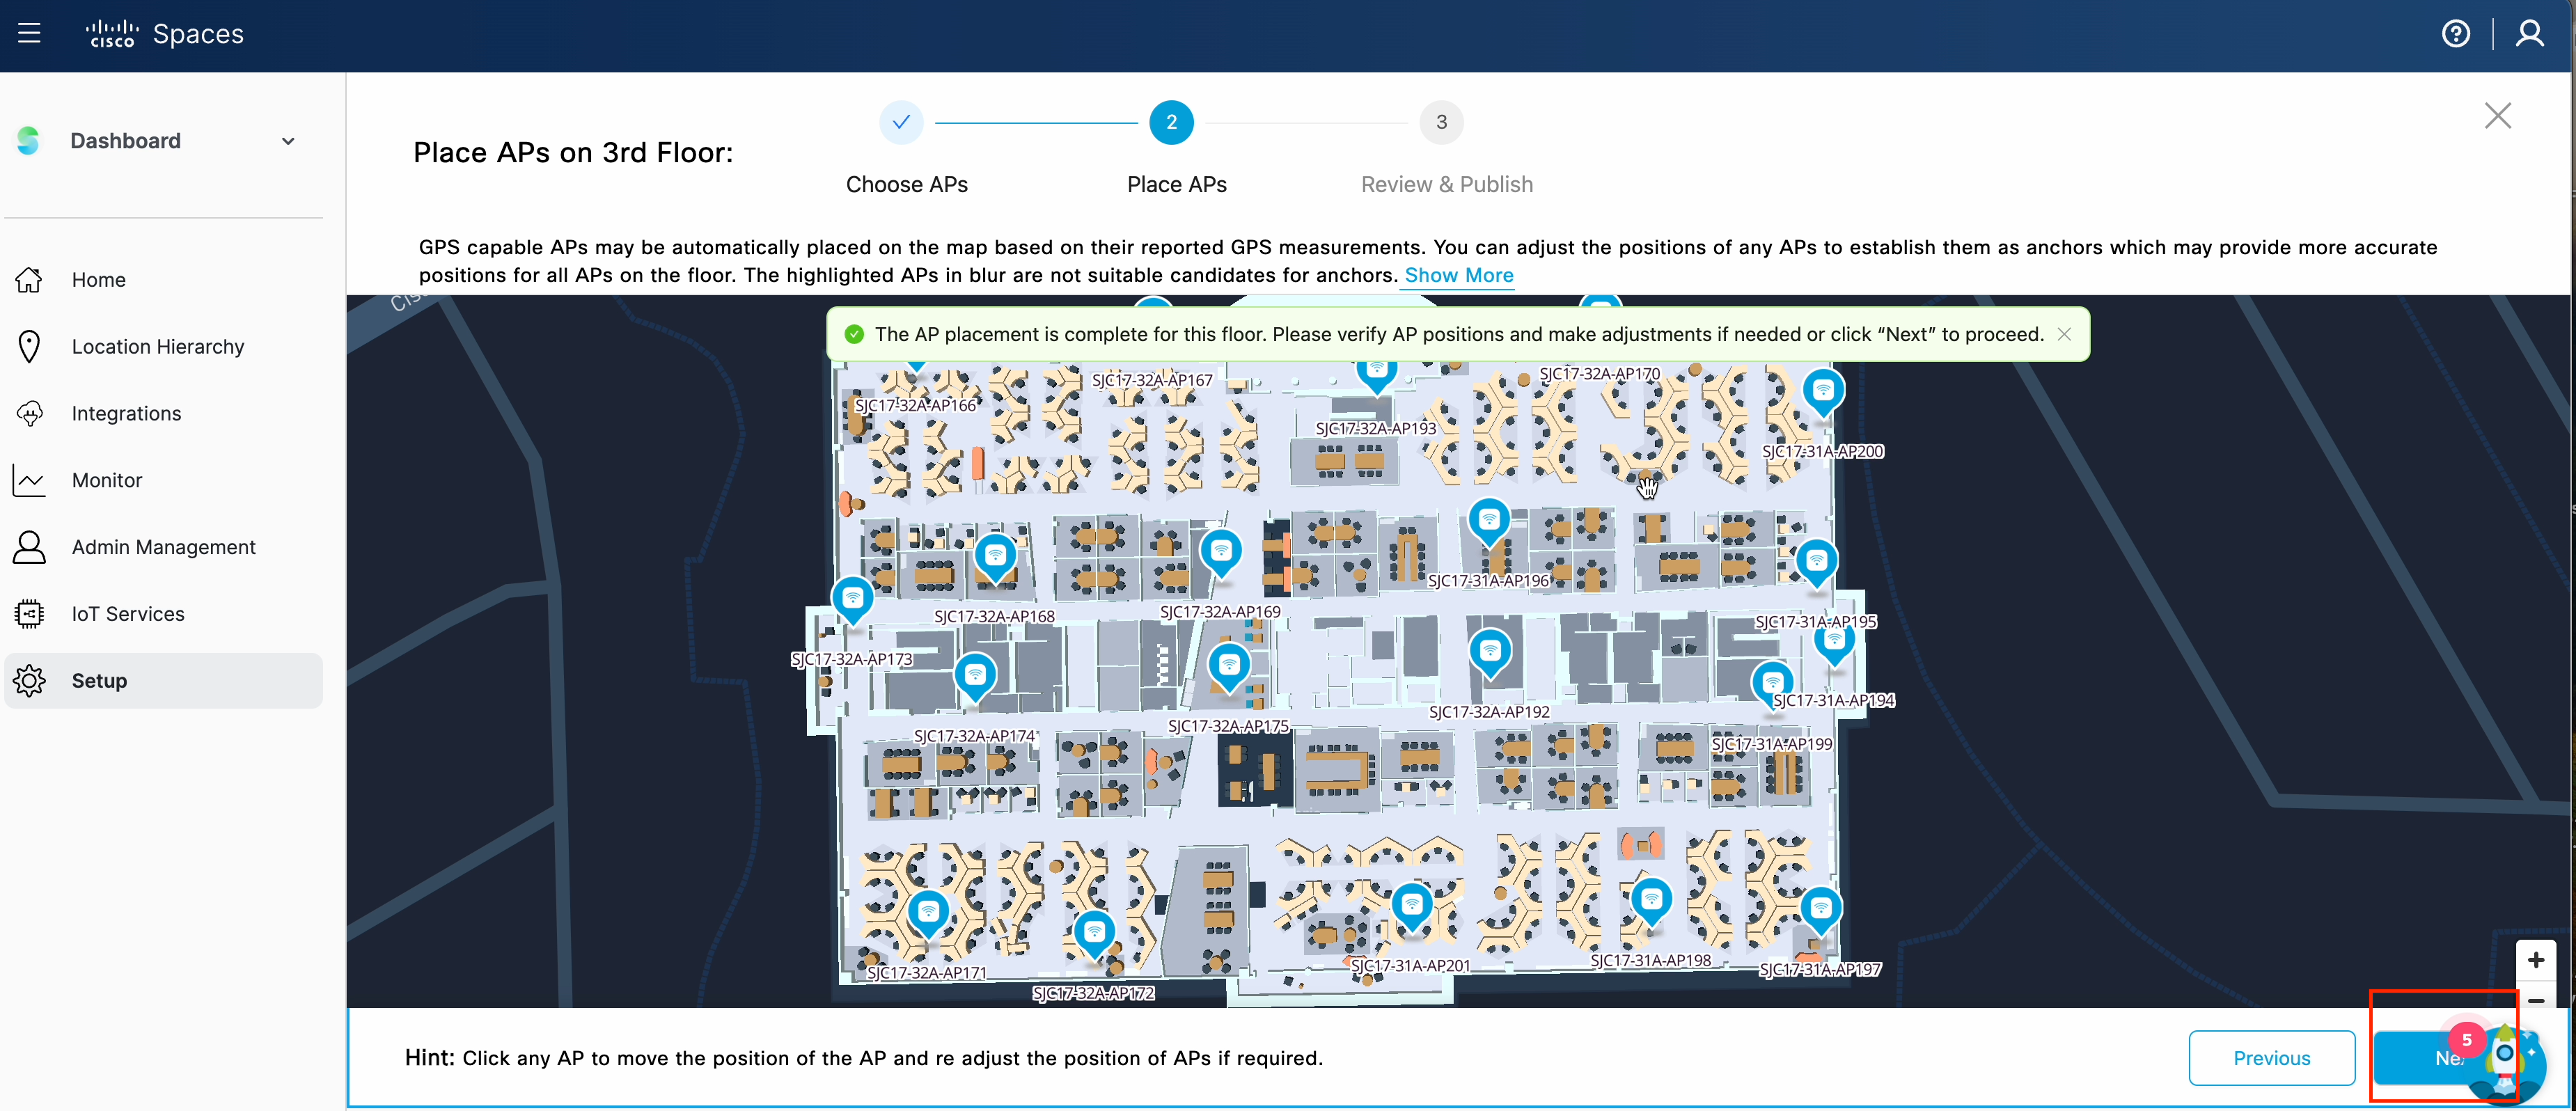
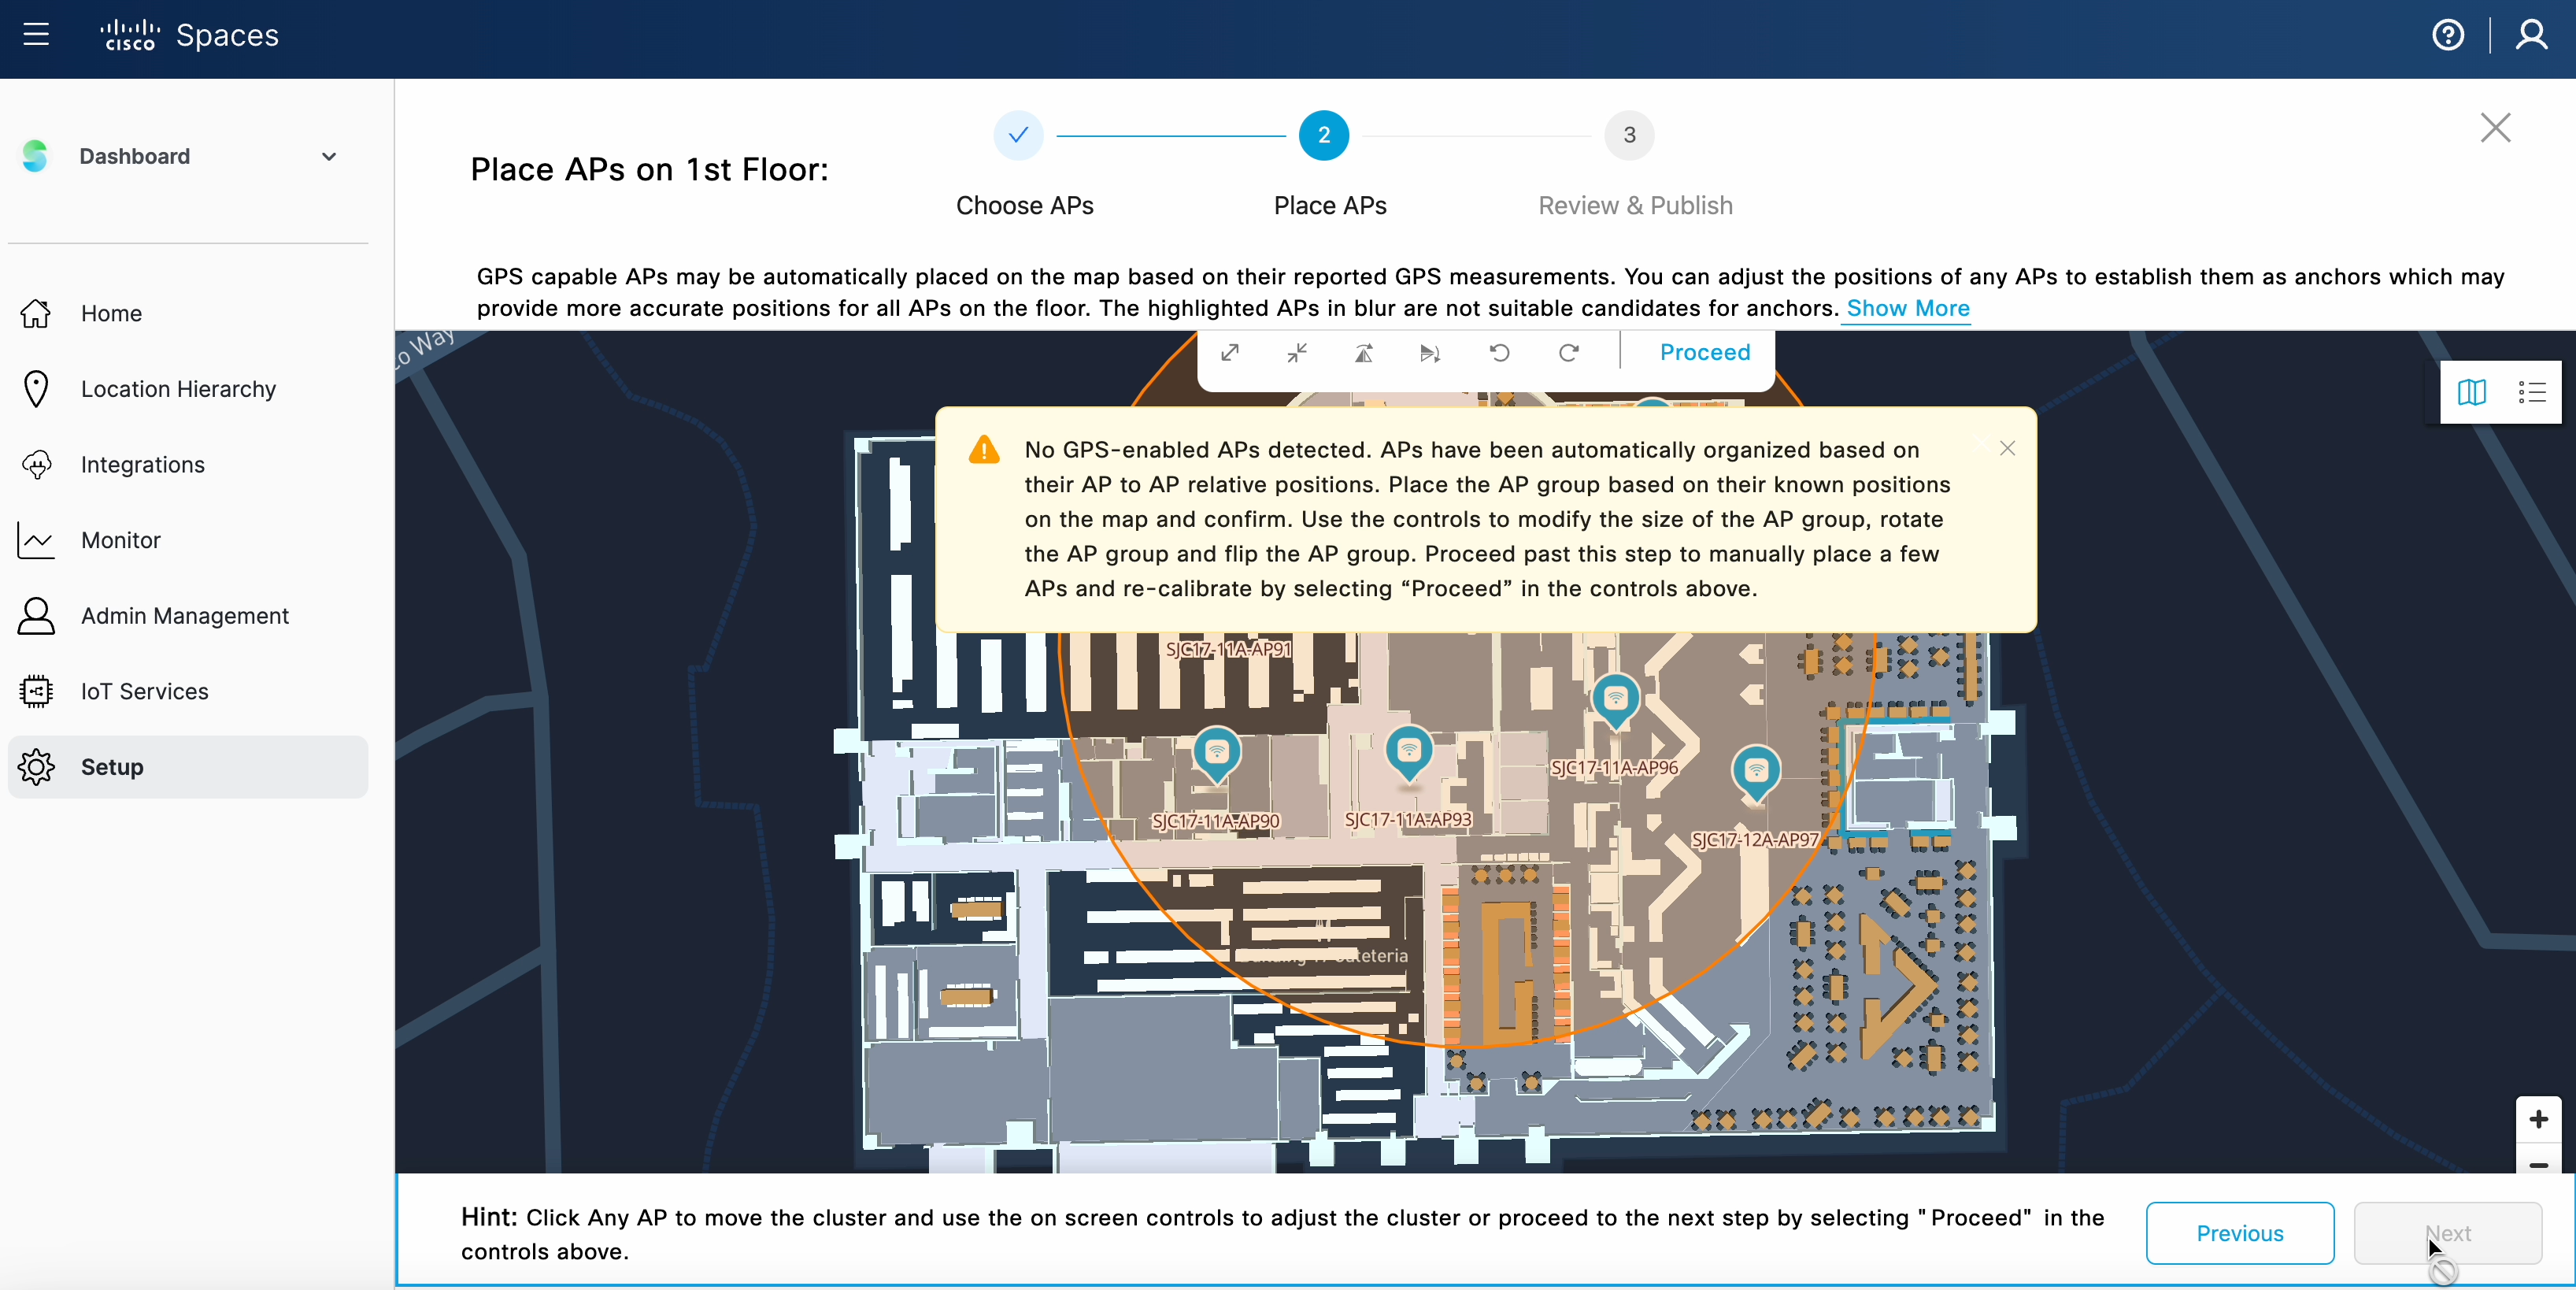
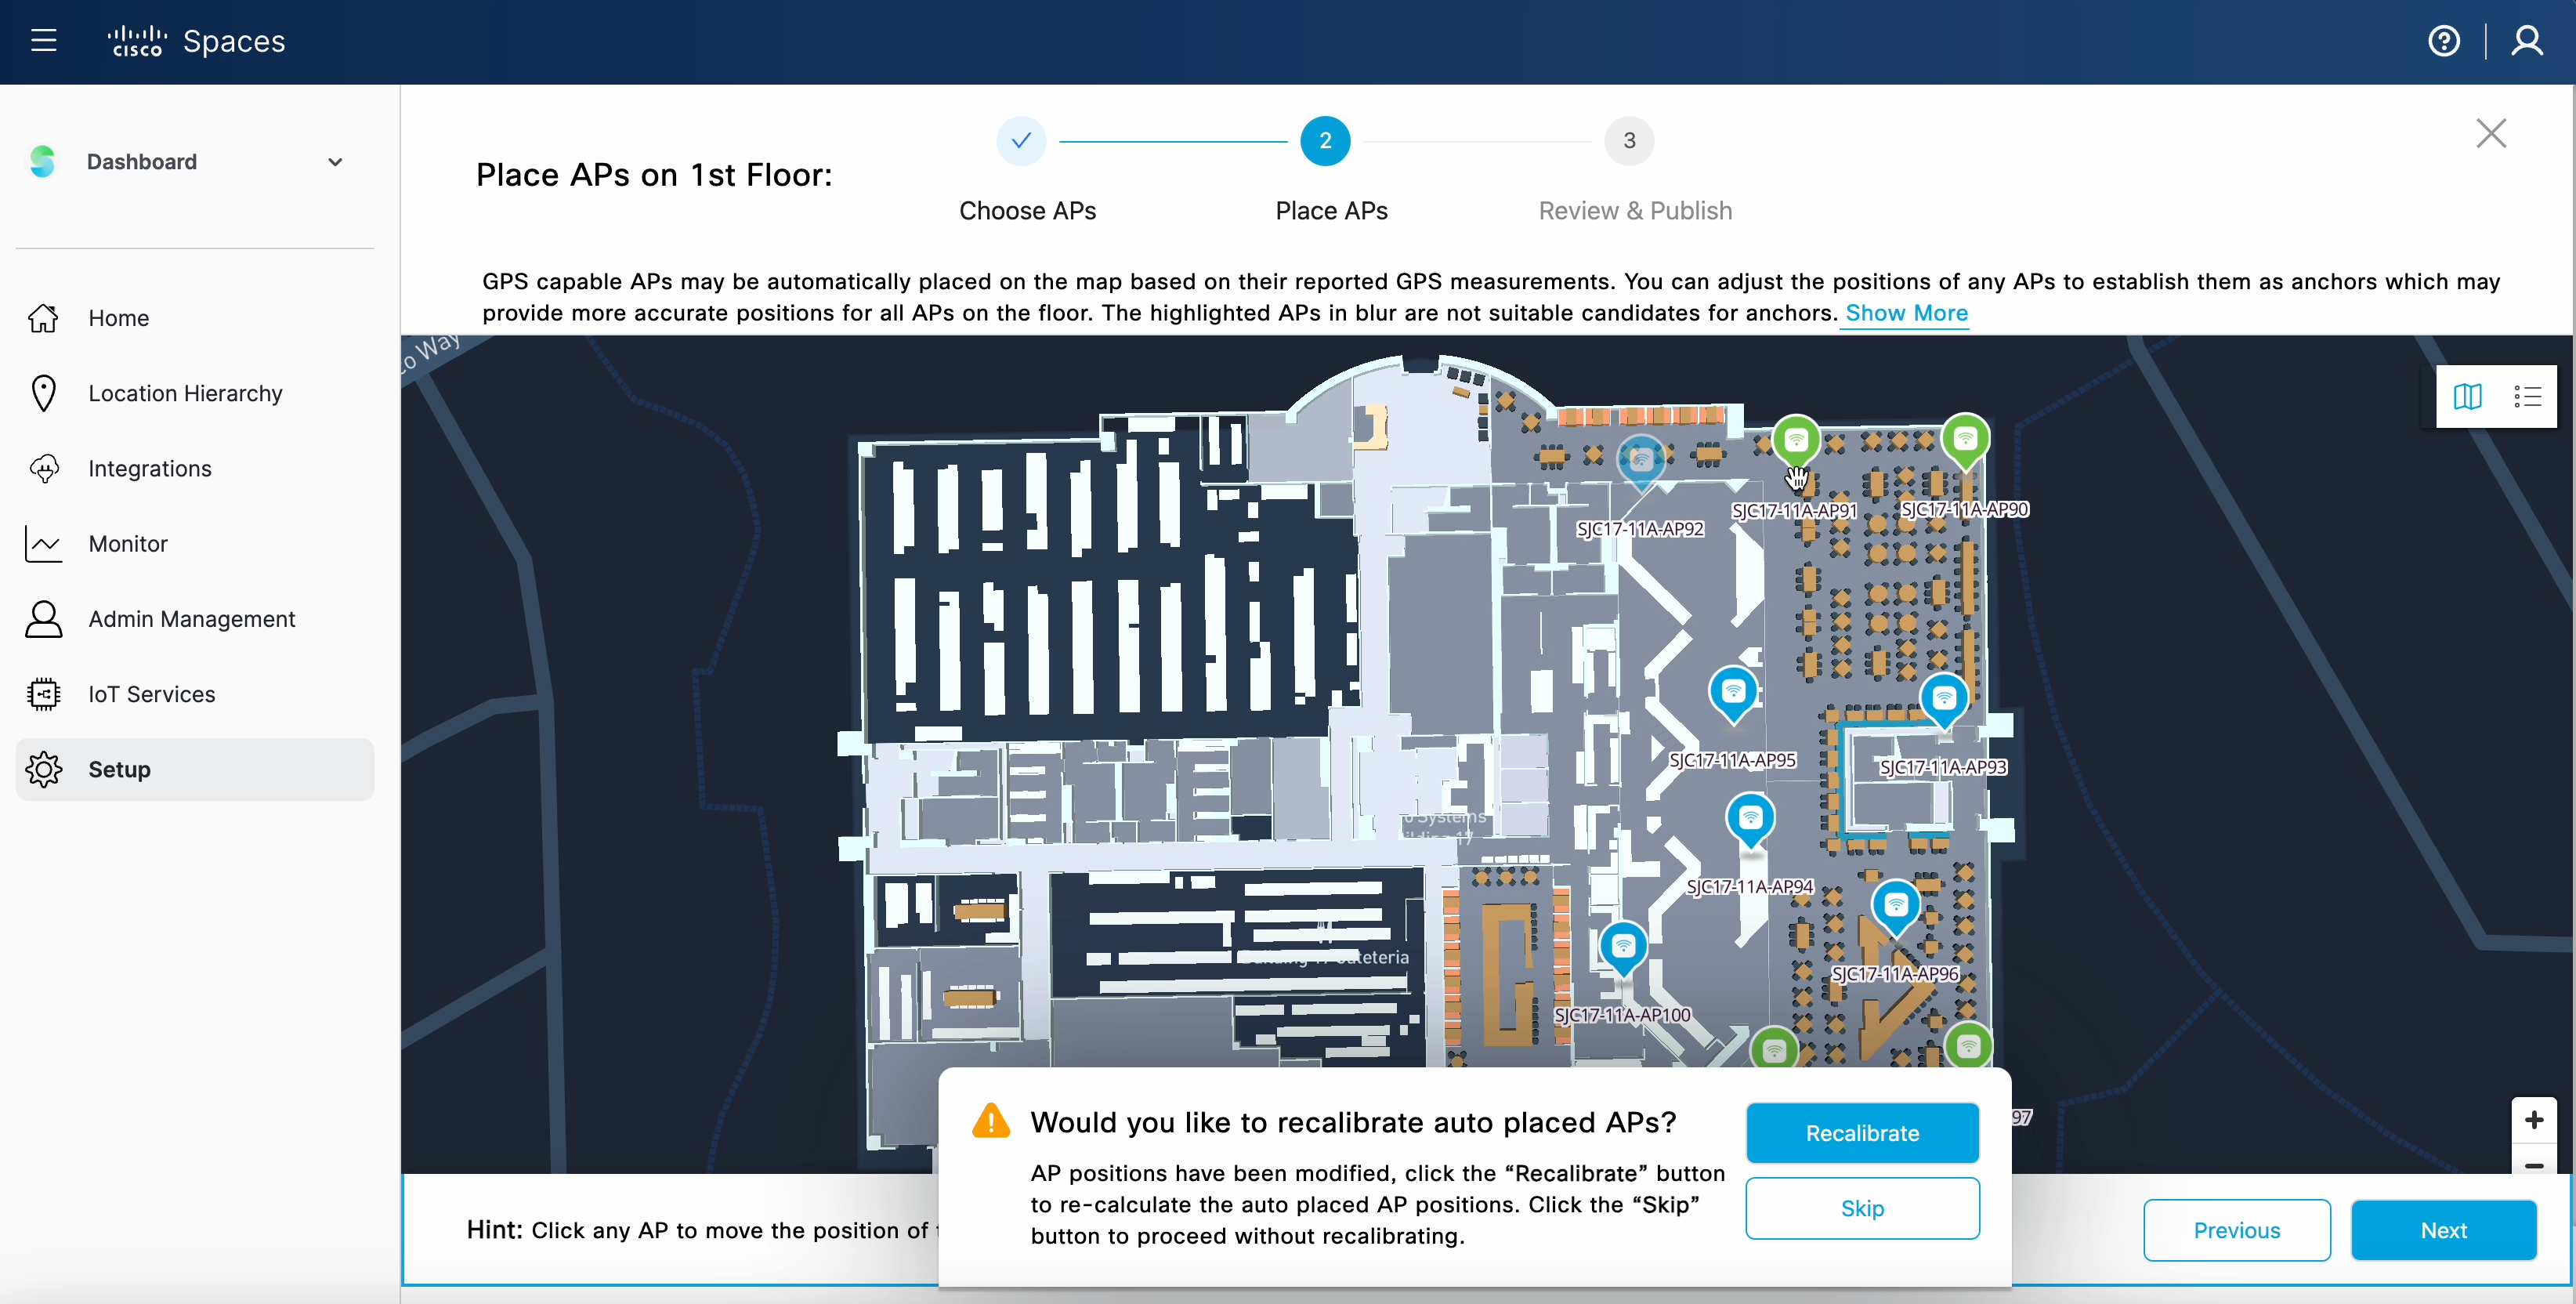
Automatically Detect AP locations​​

Provides a means to automatically determine AP locations and place them on a floor plan. ​

Value Delivered: Save time and simplify deployment​

Useful to: IT Teams​

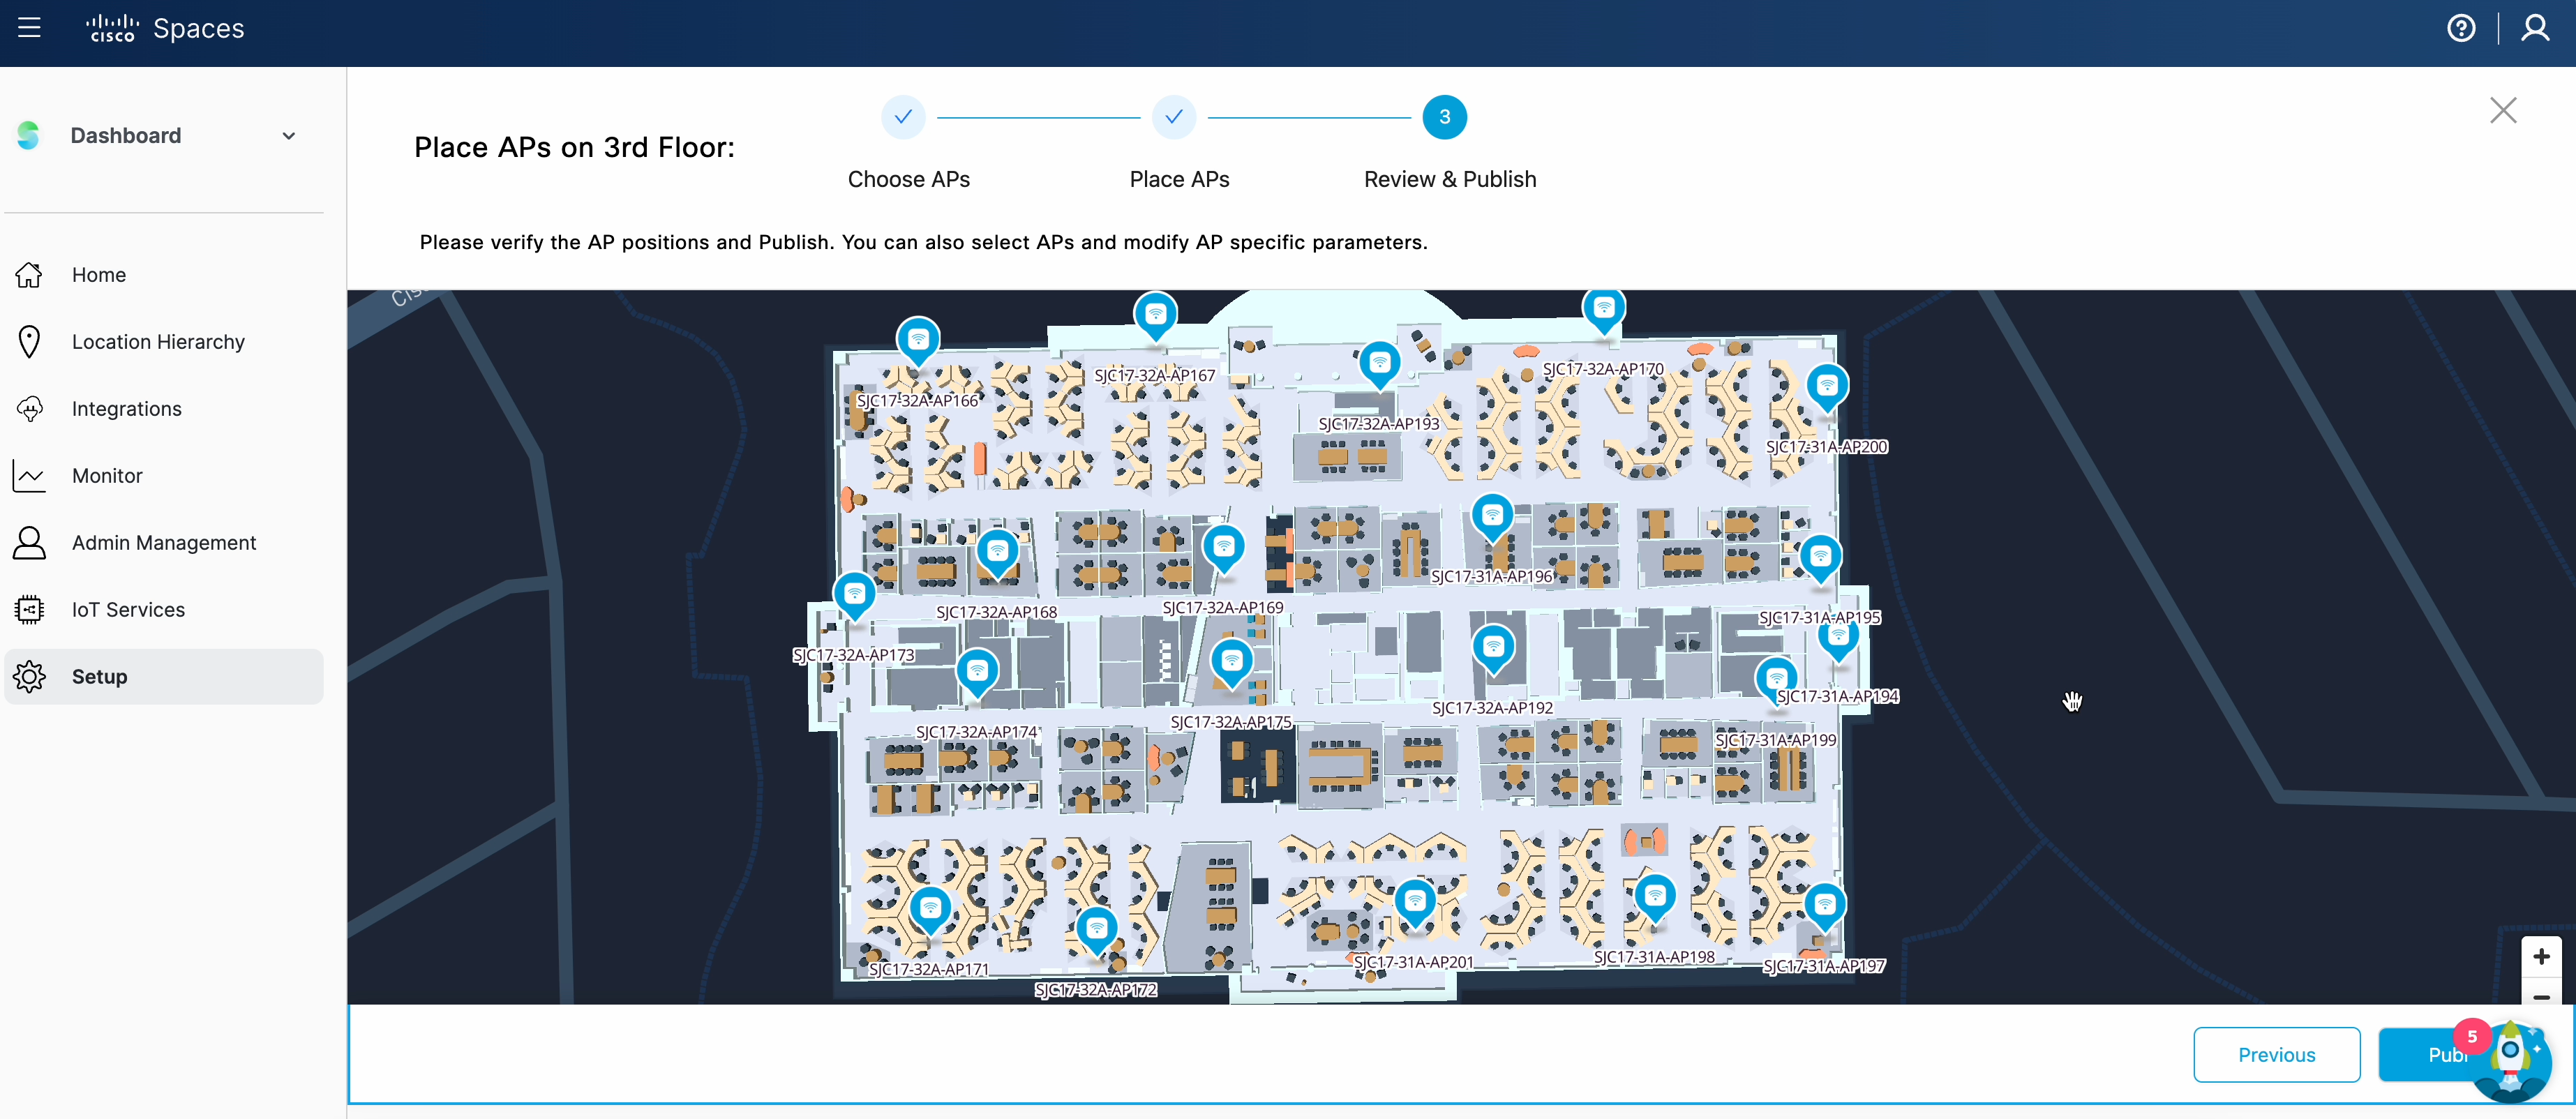
Deploy APs Efficiently​

Reduce deployment time, complexity and cost associated with verifying and placing APs on maps.

Value Delivered: Reduce troubleshooting effort​

Useful to: IT Teams​

Indoor Asset Location Accuracy​ ​

Enhanced precision in Indoor Asset Location. Achieve Accurate and Reliable Tracking of Assets within Indoor Environments. ​

Value Delivered: Improves operational efficiency​

Useful to: IT Teams​

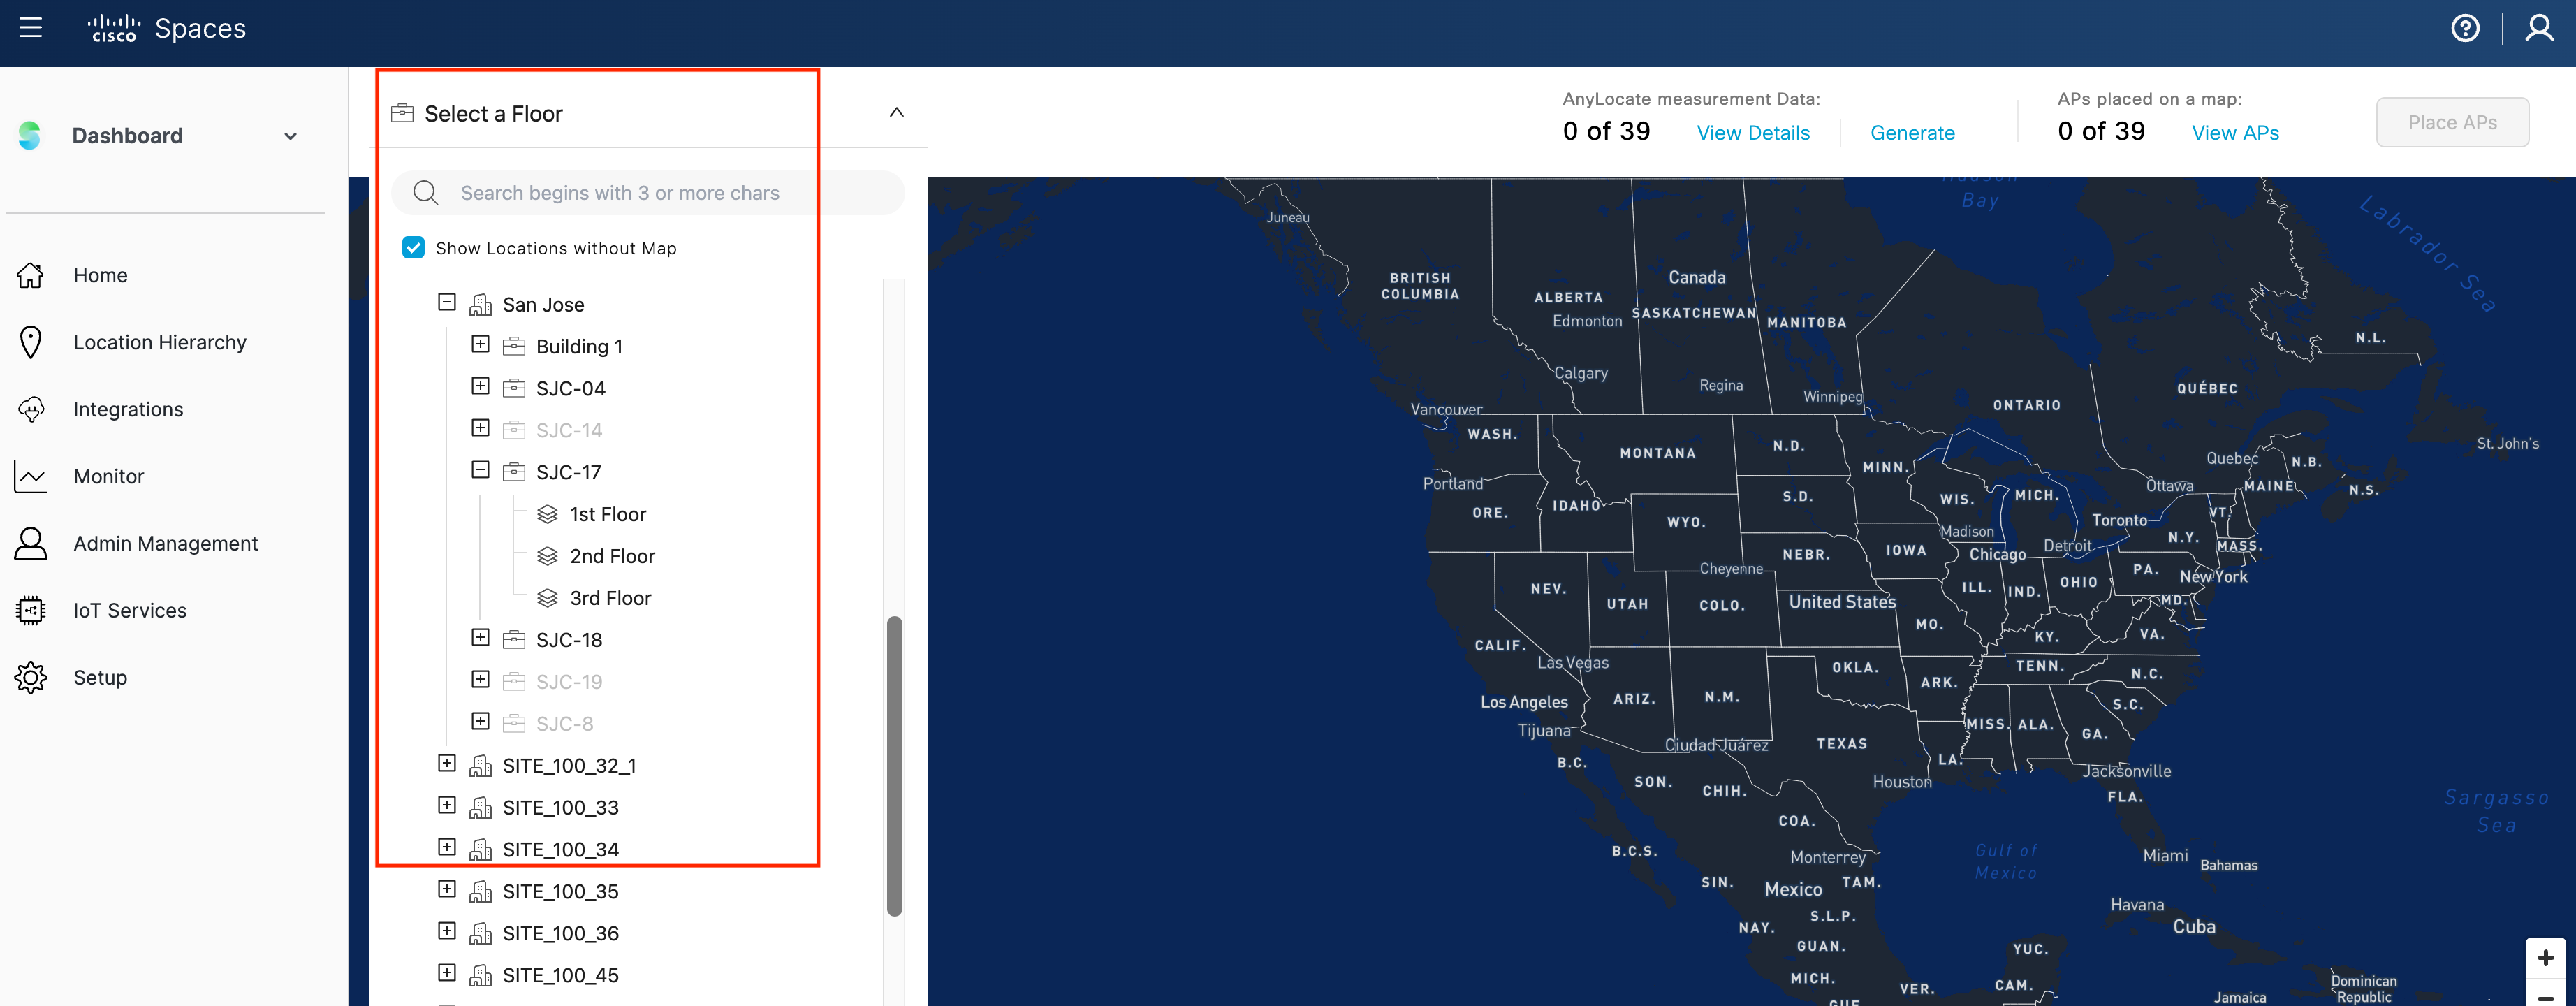
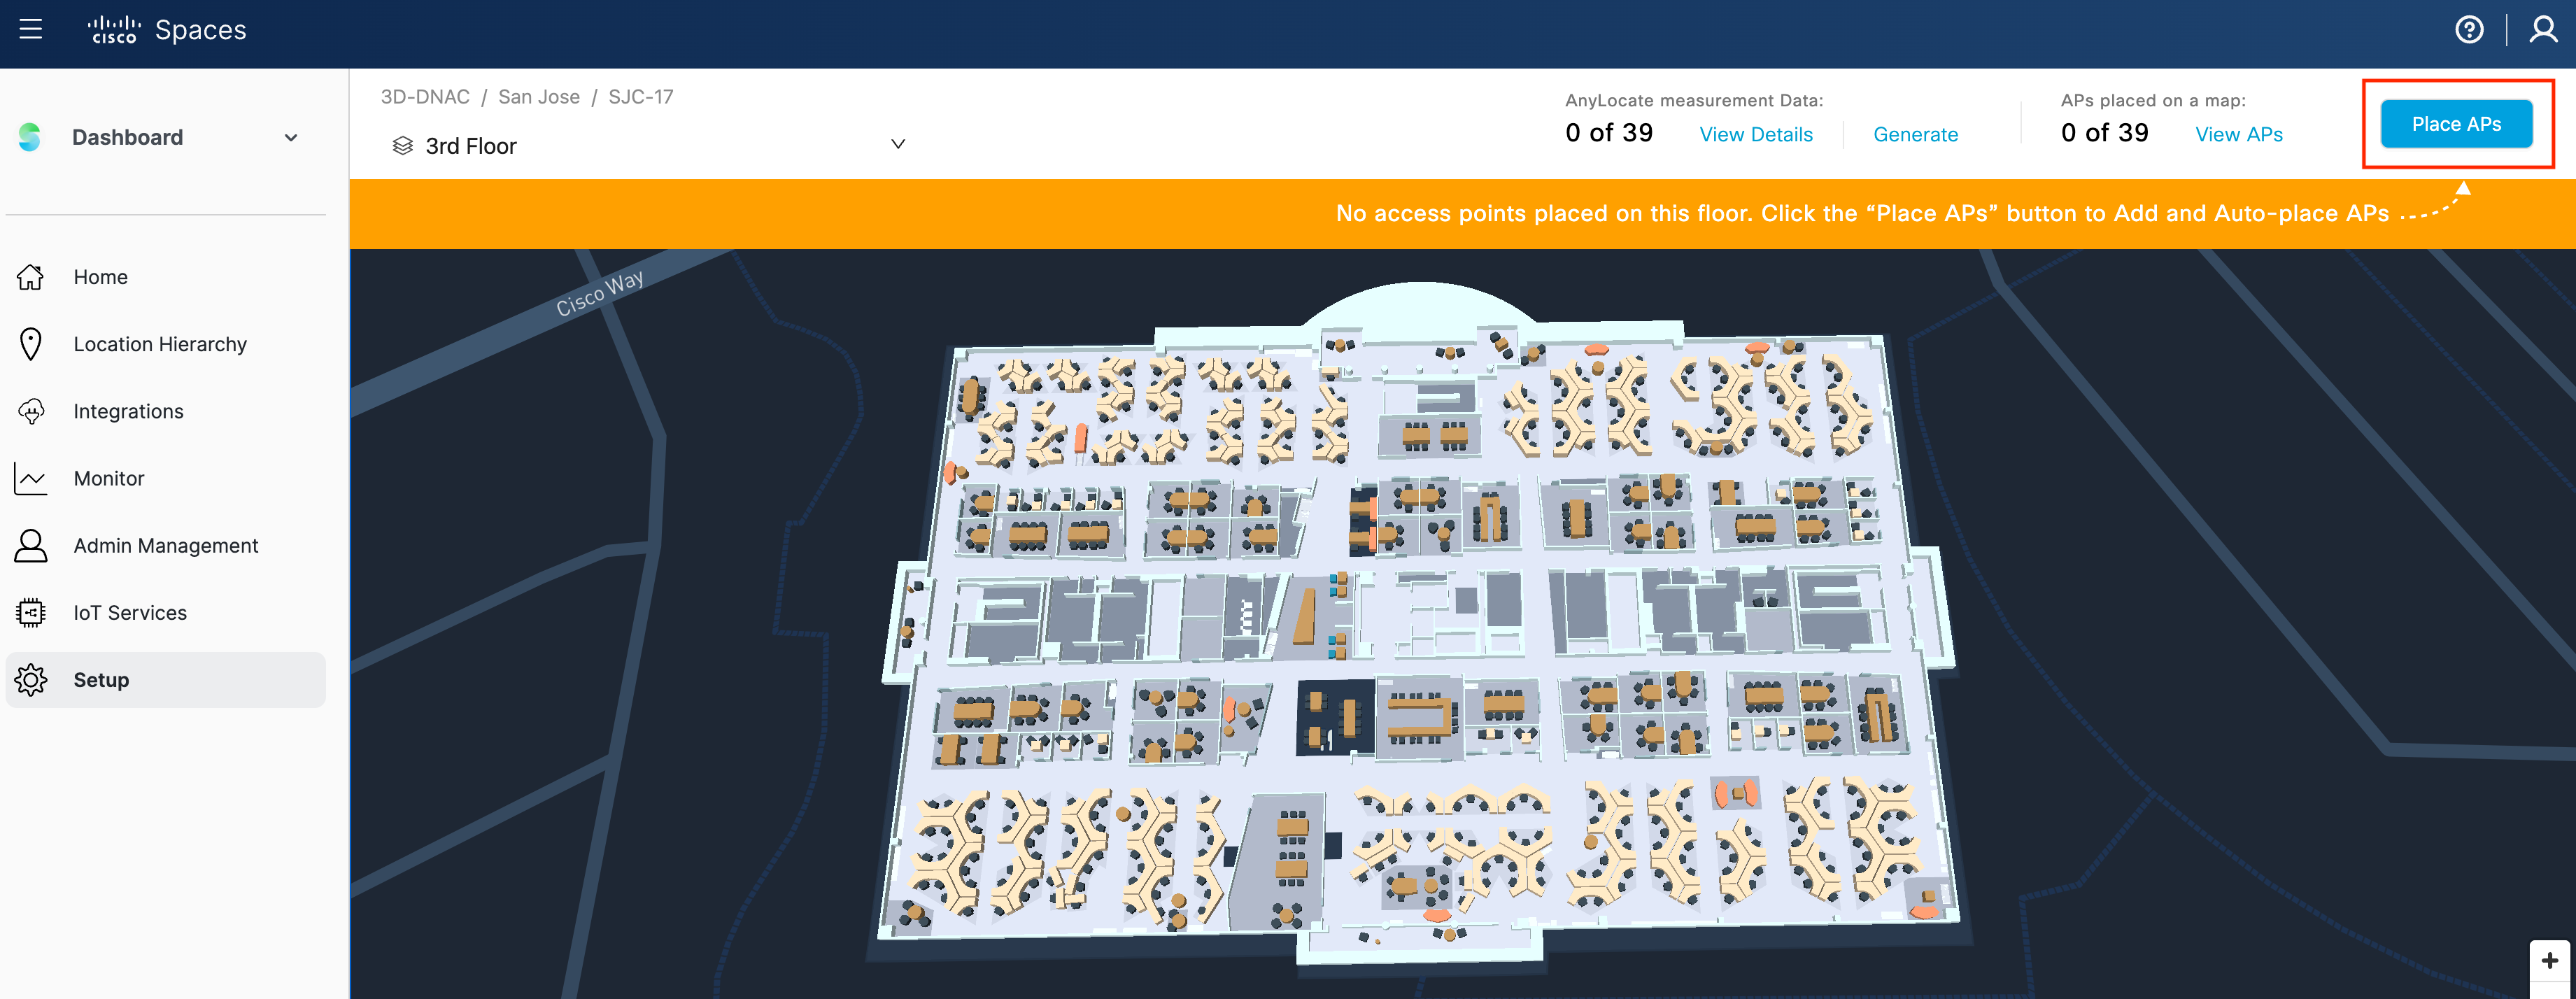
Enhanced Dashboard Experience​

Visualize and configure APs from the Spaces dashboard and drive Spaces outcomes faster and easier.​

Value Delivered: Improved productivity​

Useful to: IT teams​

Please complete the following pre-requisites to setup AP Auto Location:

  • Have an account provisioned on the Cisco Spaces platform. If you don’t have an active account, please email spaces@cisco.com
  • Create user account – Accept invitation from Cisco Spaces & setup password ​ ​
  • Set up a Cisco Spaces connector 3.1 VM : https://www.cisco.com/c/en/us/td/docs/wireless/spaces/connector/config/b_connector_30/m_ova_30.html
  • Add your Catalyst 9800 controller to Cisco Spaces. Note that AP Auto Location is only supported on Catalyst 9800 controllers running at least IOS-XE 17.12.1 or higher. ​
  • APs installed which support the AP Location : 9130/9136/9164/9166​
  • CAD .dwg files for each floor – These are used to generate the Cisco Spaces Rich Maps​
  • 9800 AP site tags – The AP to AP FTM ranging process can run on a per site tag level, it would be helpful if the APs for AP Location have a common site tag or site tags. The feature will not work on the default site tag.​
  • If you have GPS capable APs and the APs are located in an area that can acquire a good GPS signal, the placement may be completely automatic.
  • Otherwise, the feature will determine the position of the APs relative to one another, and an administrator can easily orient the cluster of APs on the digital map.
  • Make sure to update the Location service version to the latest available version. The minimum Location service version that supports the feature is 3.1.0.102.

Note: At this time the AP Auto Location feature will not allow you to publish the map if there is an existing map from either Prime Infrastructure or Catalyst Center (formerly DNAC) with the same APs already placed. Also at this time Catalyst Center does not allow Spaces to sync the maps with the APs auto placed back to Catalyst Center (formerly DNAC).

  • In your Cisco Spaces dashboard under Setup > Connectors, select the desired 3.x connector and “Add Controller”.

  • Fill in the needed controller information and make sure to choose your Controller Type as Catalyst 9800. If your 9800 controller is already added to another connector, that is ok, it can also be added to this 3.x connector.

  • In your Cisco Spaces dashboard under Location Hierarchy check to see if you already have an entry for the desired Building/Floor.
In order to begin the AP location process, we first need to generate the AP to AP ranging data for the desired APs. The steps below in this section will guide you through generating the AP to AP ranging data that will be used to Auto place your APs in Cisco Spaces.​

About AP Ranging:​

The “ranging” measurement process changes the channel of APs in the selected area to a common channel and uses Fine Time Measurement (FTM) to determine the distance between the APs. This process only needs to be run once, or when APs are moved or added to the environment. The measurement process is impactful to client performance and connectivity while it is running. This process can take up to 10 minutes to complete, and it is recommended to schedule the ranging process to run during times when your network is less busy.​

  • Under Setup > Device Placement select “Generate Ranging Data”
  • Make sure to note the on-screen warning indicating that the AP ranging process will be disruptive for the APs participating in the ranging process​
  • The AP ranging process can be triggered on a per site tag basis​
  • The default site tag does not support the AP ranging process​
  • ​Select the desired APs you wish to run the AP ranging process by checking the box next to the site tag as seen in the image below where we have selected the “SJC17-Floor3” site tag​​
  • You can view the list of selected site tags on the right-hand side of the screen, this list will show all selections sorted by controller​​
  • Select “Next”
  • It is recommended to run the ranging process during times when your network is less busy as the process will be disruptive​​
  • To schedule the ranging AP process select “Schedule it for later” and choose the date/time for the process to run​​
  • ​Run the AP ranging process now by selecting “Generate Now”​​
  • Select “Generate”
  • After selecting the “Generate Now” option you will see a countdown timer that allows you to cancel the AP ranging process for up to 20 seconds.​
  • Select “Cancel” within the 20 seconds if you wish to cancel the AP ranging process
  • After completing Step 3 you should be taken to the AP ranging status page​​
  • You can also navigate to this page under Setup > Device Placement and “View Details” under “AP to AP ranging data:” in the page header​​
  • Here you will be able to view the status of either APs in progress running the AP ranging process

    ​​
Now that the AP to AP ranging process is complete for the desired APs, Cisco Spaces has the needed data to place the APs. One of the key enhancements to the AP Auto Location feature is no longer needing to manually choose Anchor APs in either scenario: APs with GPS or without GPS.​

  • Navigate to Setup > Device Placement​​
  • Select the floor that you want to place APs on from the “Select a Floor” dropdown

    ​​
  • Select “Place APs” at the top of the page

    ​​
In the latest release, we have implemented AP Auto clustering which automatically groups APs into clusters based on information such as WLC, CDP information, site tag, AP name prefix, neighbor information and other potential sources of data.​

  • The AP clusters can be expanded by selecting the “>” to the right of the cluster
  • Individual APs can be de-selected from the clusters if necessary
  • Multiple AP clusters can be selected to assign to the same floor if necessary
  • If there are APs that are unable to be clustered, there is an “Ungrouped” cluster in which individual APs can still be selected to be assigned to the floor
  • You can also use the available filters such as AP name, controller, site tag etc. to filter the AP list
  • View the status of the selected APs by hovering over the AP list on the right which shows additional information about the AP
  • ​ Select “Next” to continue​​​

    ​​
  • If GPS is available on the APs all APs may be auto-placed on the floor as seen in the image below
  • You can also manually adjust APs as needed to fine-tune their locations
  • If you adjust a minimum of 4 APs you will be prompted to re-calibrate which will trigger the system to re-run the auto-placement algorithms with the manually adjusted APs as input into the algorithm
  • Select “Next” to continue.

    ​​
  • If you do not have APs with GPS capabilities, the AP placement algorithm will provide cluster of APs over the floor map.
  • This cluster of APs is based on their AP-to-AP ranging information which defines the distance between each of the APs in the cluster to each other
  • You can then adjust the AP cluster using the controls at the top to flip, rotate and increase/decrease the size of the AP cluster
  • If you would like to skip adjusting the AP cluster and manually place a few APs you can select “Proceed”
  • You can also select “Proceed” and manually adjust APs as needed to fine-tune their locations
  • If you adjust a minimum of 4 APs you will be prompted to re-calibrate which will trigger the system to re-run the auto-placement algorithms with the manually adjusted APs as input into the algorithm
  • Select “Next” to continue.

    ​​


    ​​

    ​​
  • To make any adjustments to the auto-placed APs select “Previous” to go back to make adjustments to the AP positions
  • Select “Publish” to complete the process

  • ​​
  • After publishing the floor map with the APs placed a version of the map will be automatically created in Detect and Locate which will allow client locations to immediately start to be calculated.

Please take a moment to check if you’re able to successfully use the feature. Click on ‘yes’ to indicate it’s working. And on ‘Not yet’ if you need any assistance. ​