
 Talk to an Expert
We will help you get your Cisco Spaces dashboard up and running in no time.
Tell us how we can assist you?
NOTE: Please proceed to the next step if you have imported maps from DNA Center, or have imported Meraki APs
Here are the steps to Integrate with DNA Center
Here are the steps to setup your Meraki connection
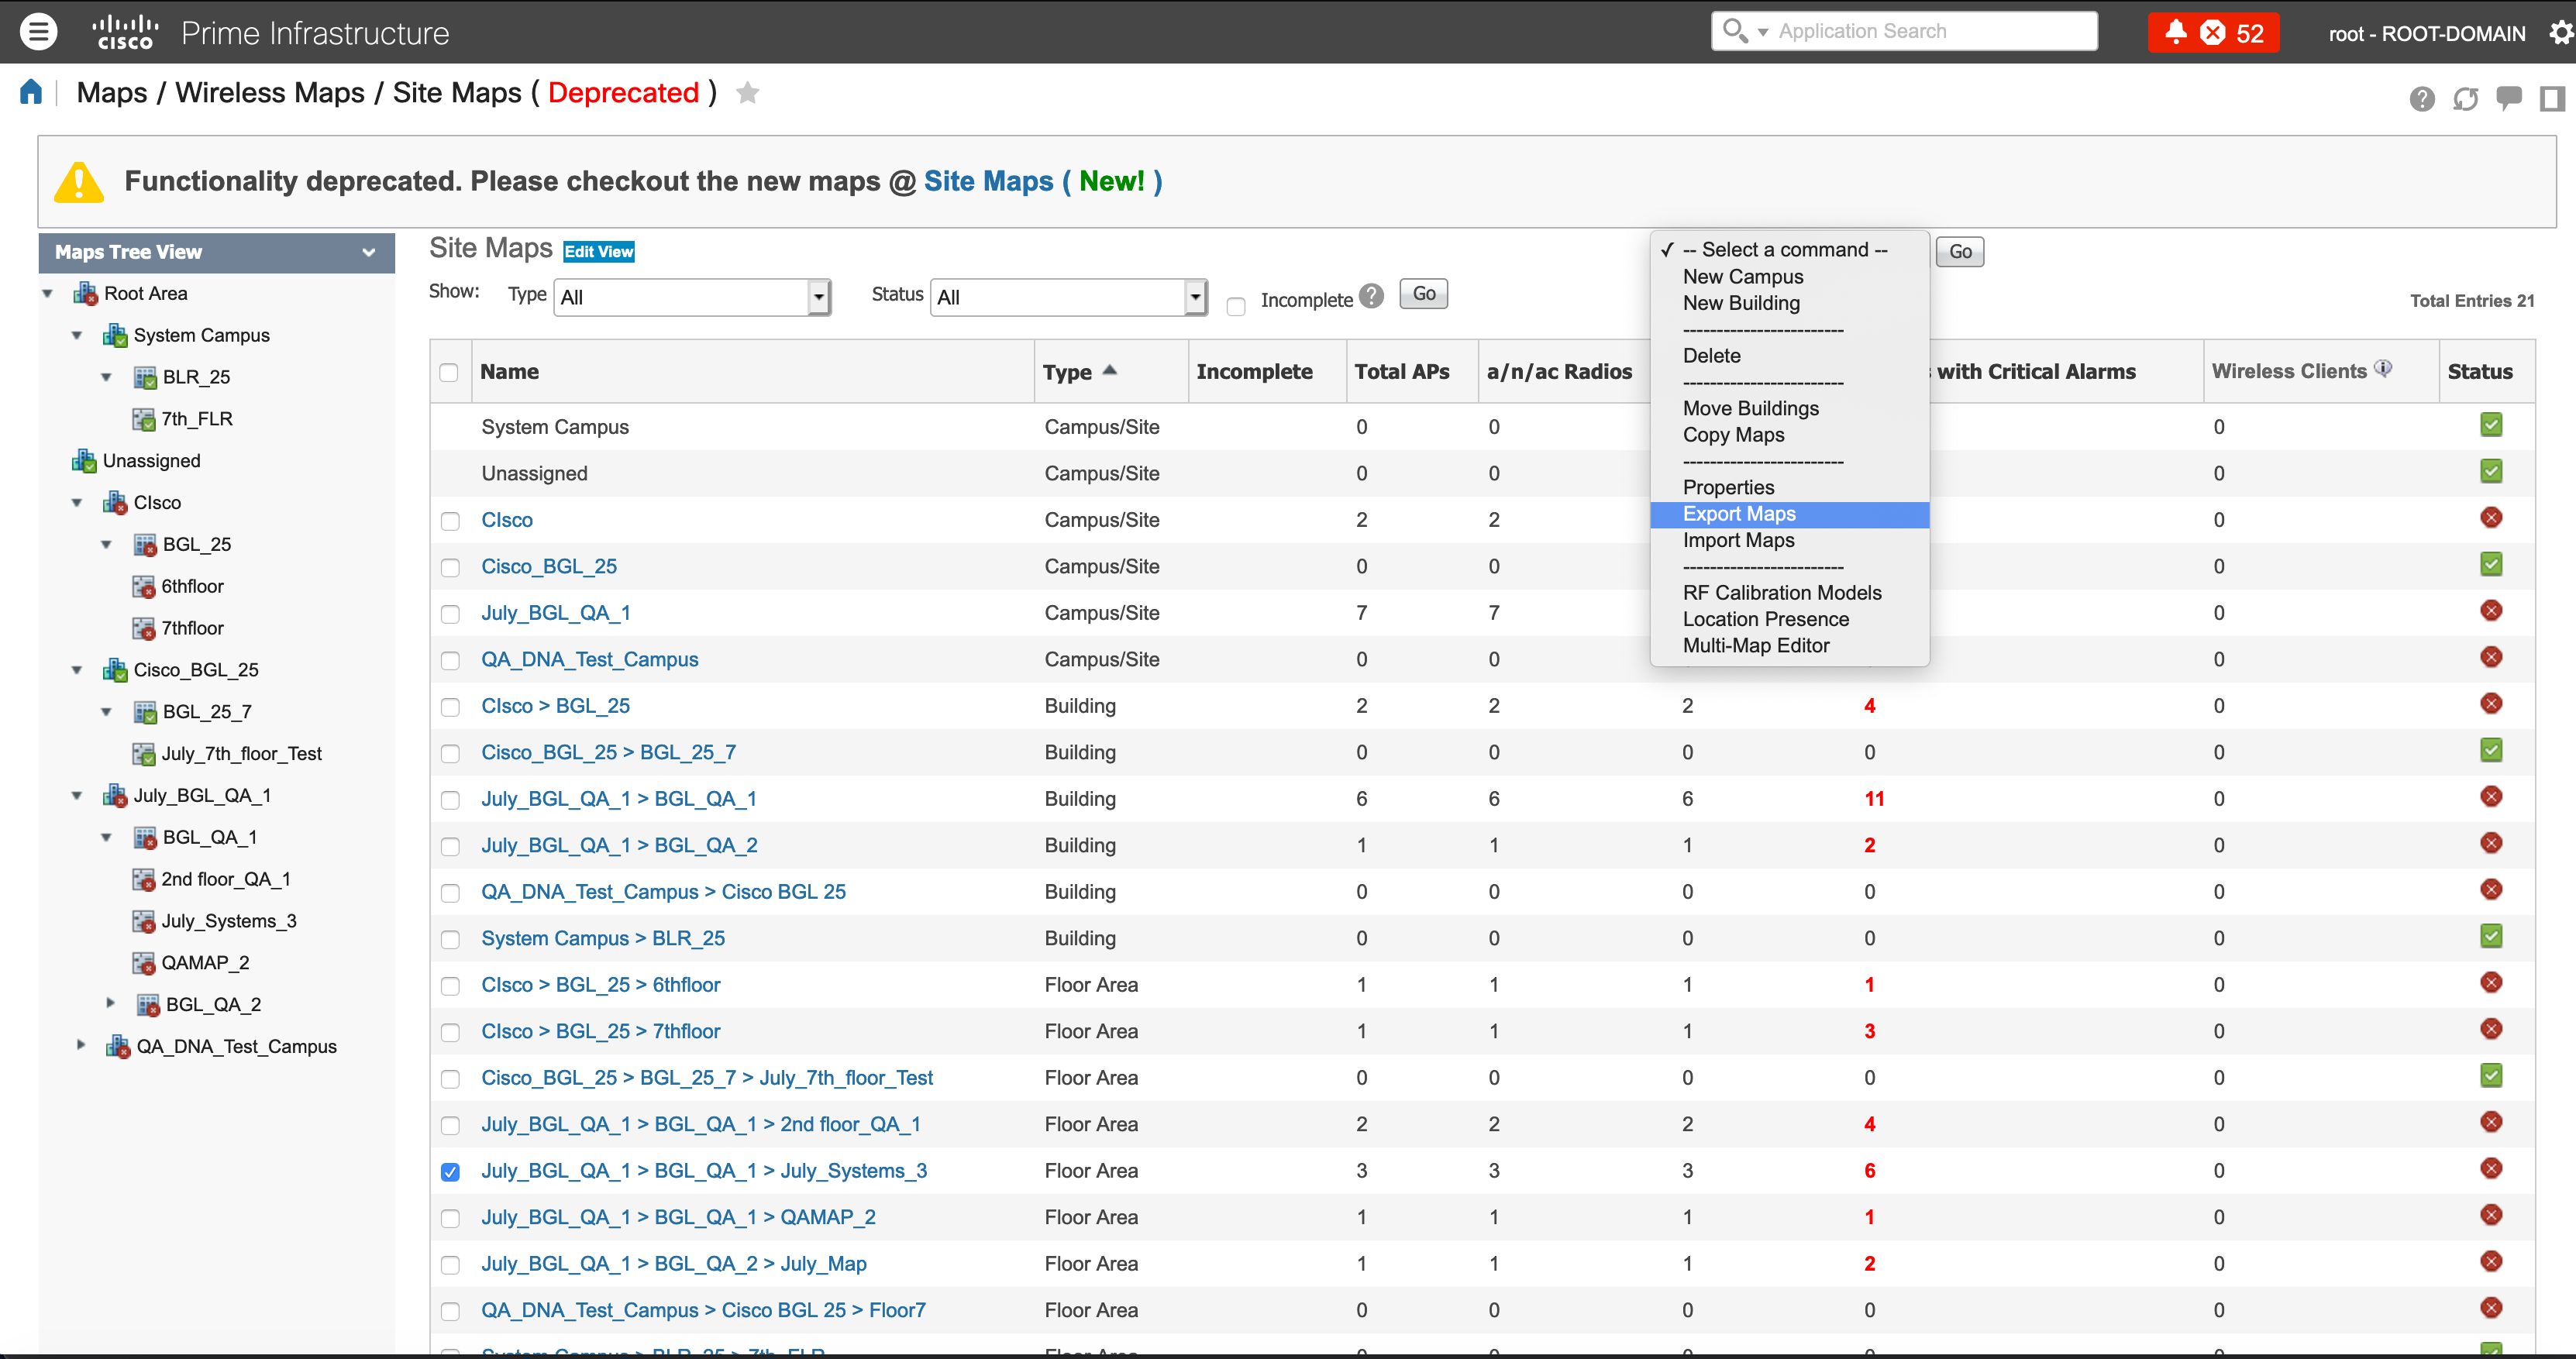
Login to Cisco Prime Infrastructure and browse to Maps/Wireless Maps/Site Maps
From the “Select a Command’ drop down, select ‘Export Maps’
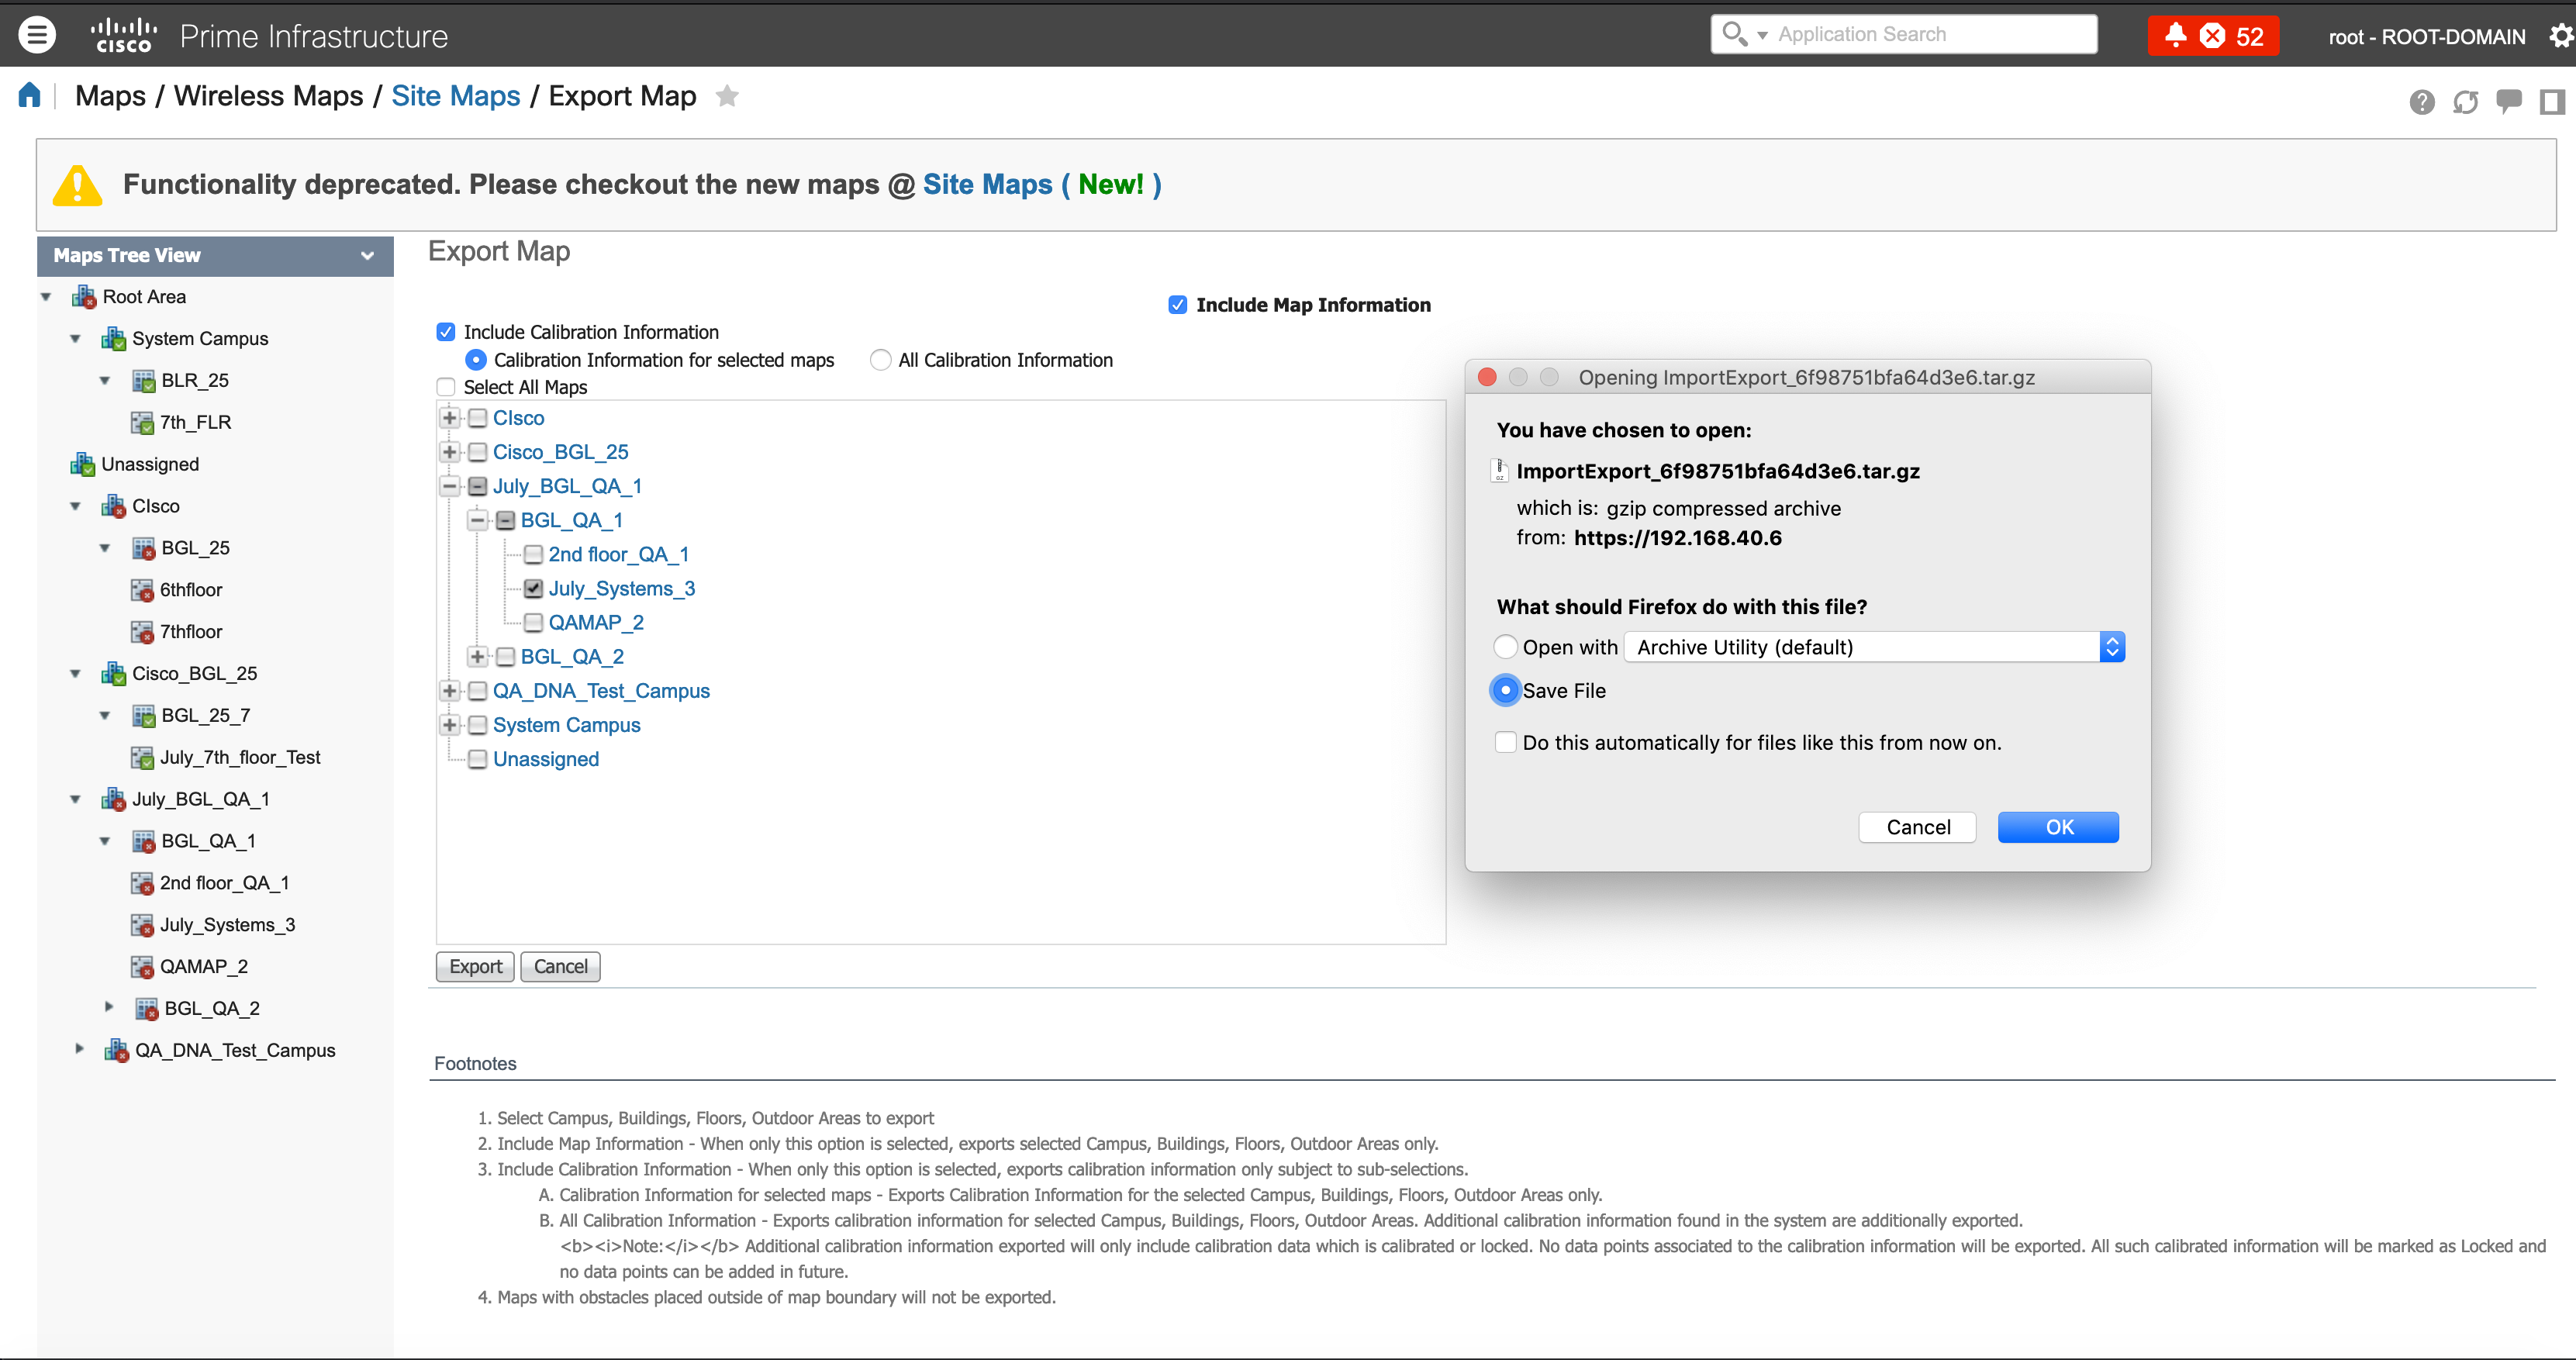
Save the ‘tar.gz’ file on your computer
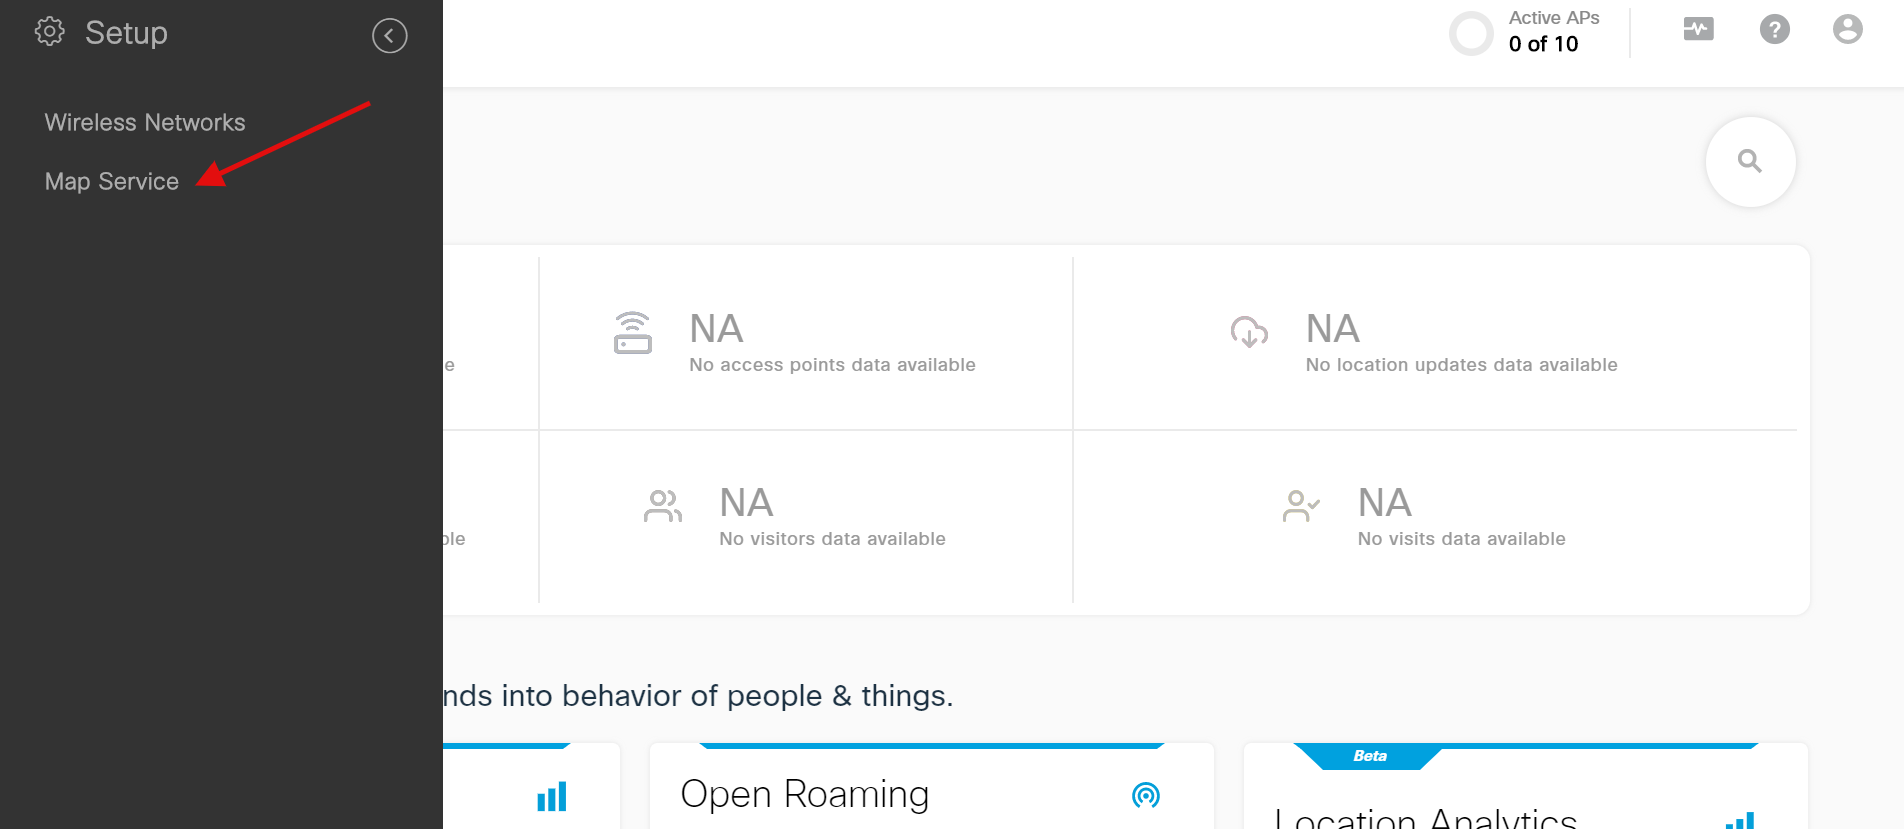
Login to Cisco Spaces account and browse to ‘Setup > Map Service’ from the Hamburger Menu button on the top left corner.
Upload the ‘tar.gz’ file you’ve exported from Cisco Prime. (Wait for few mins for the Maps to be uploaded. Please ignore any file limit message)

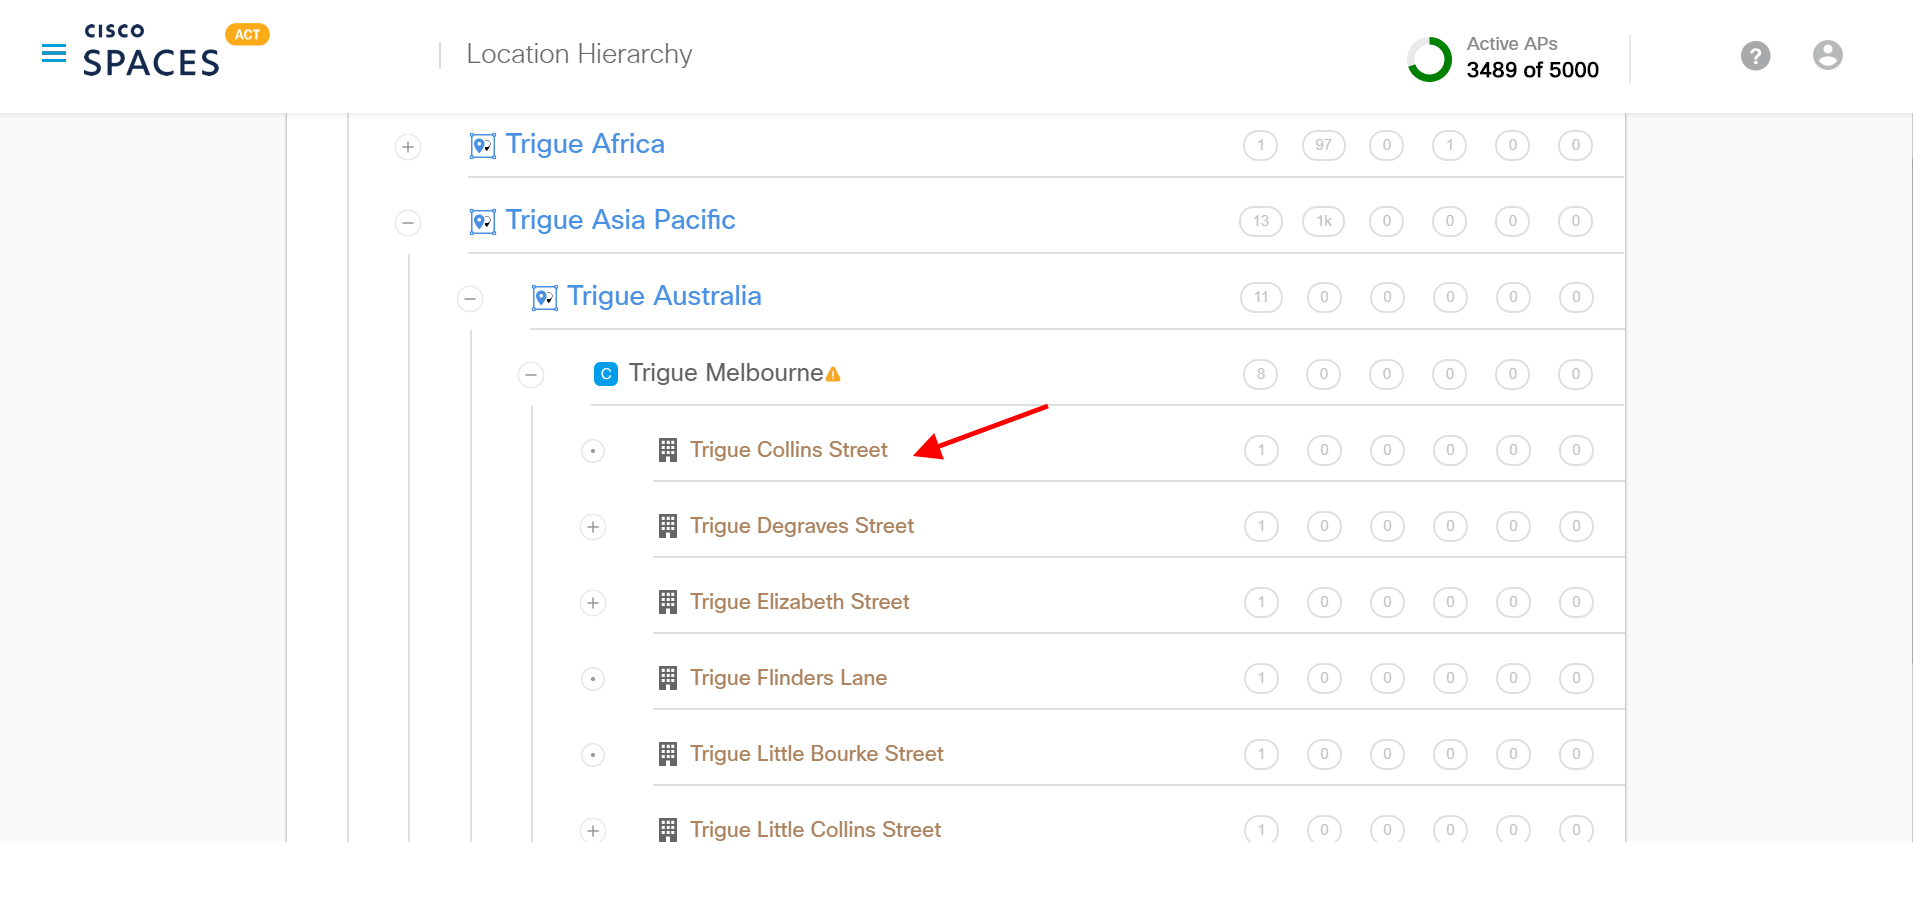
After the maps are successfully uploaded, please browse to ‘Location Hierarchy’ section from the Menu
If you had already imported the access points directly into Cisco Spaces in the past, please delete them to avoid duplicacy. If not, skip this step
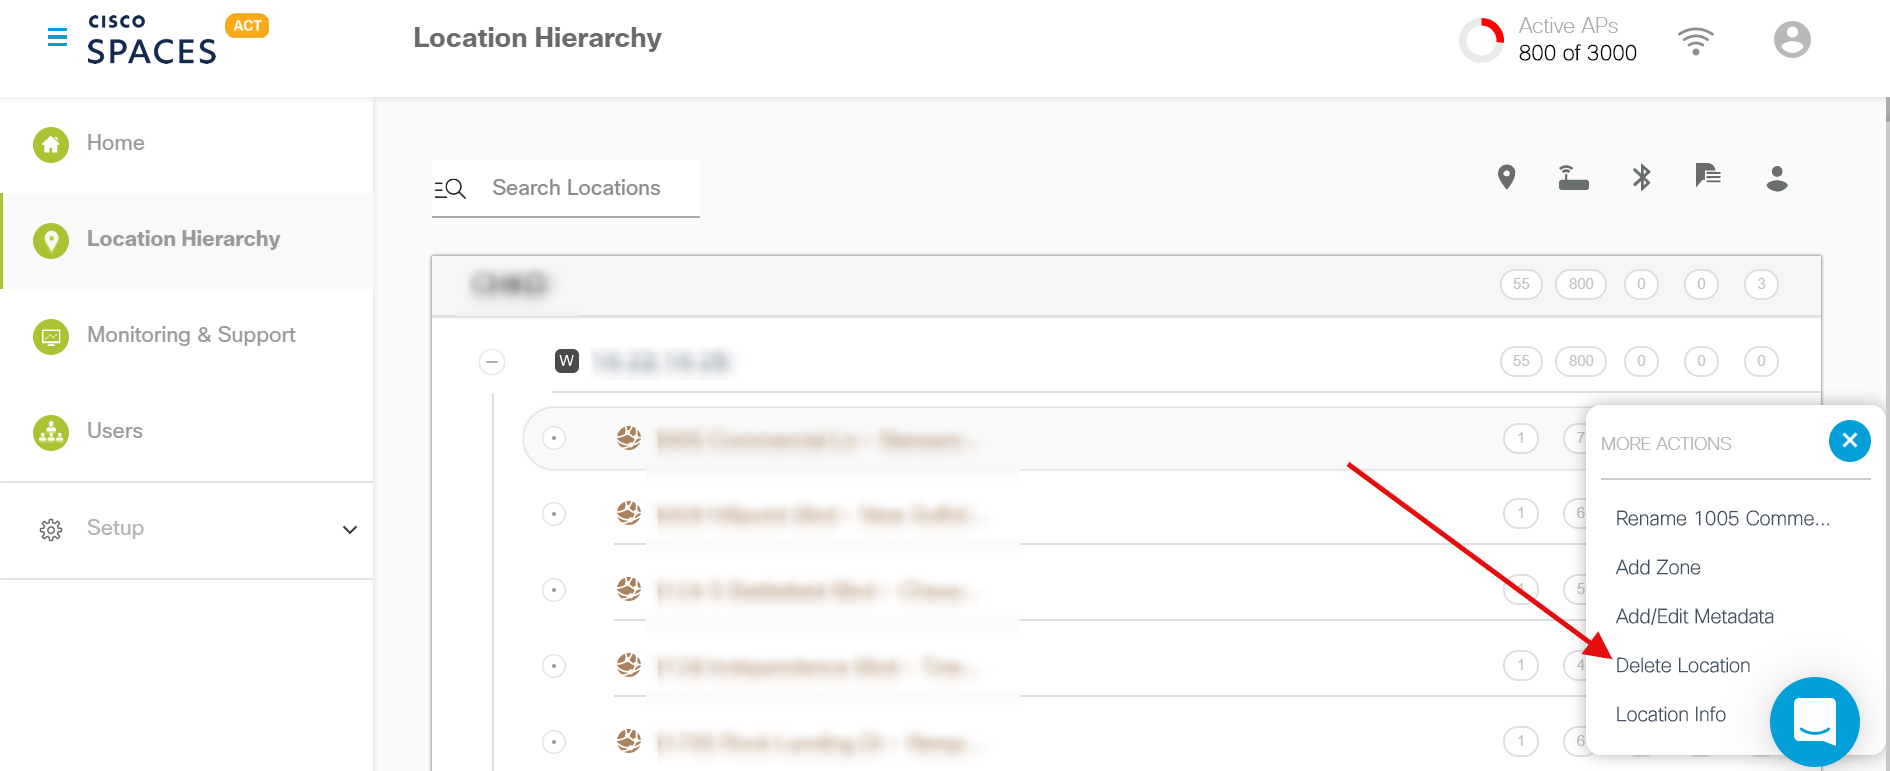
In the Location Hierarchy page, click on the Location where you want to add location info.
Click “Edit” on Location Data.
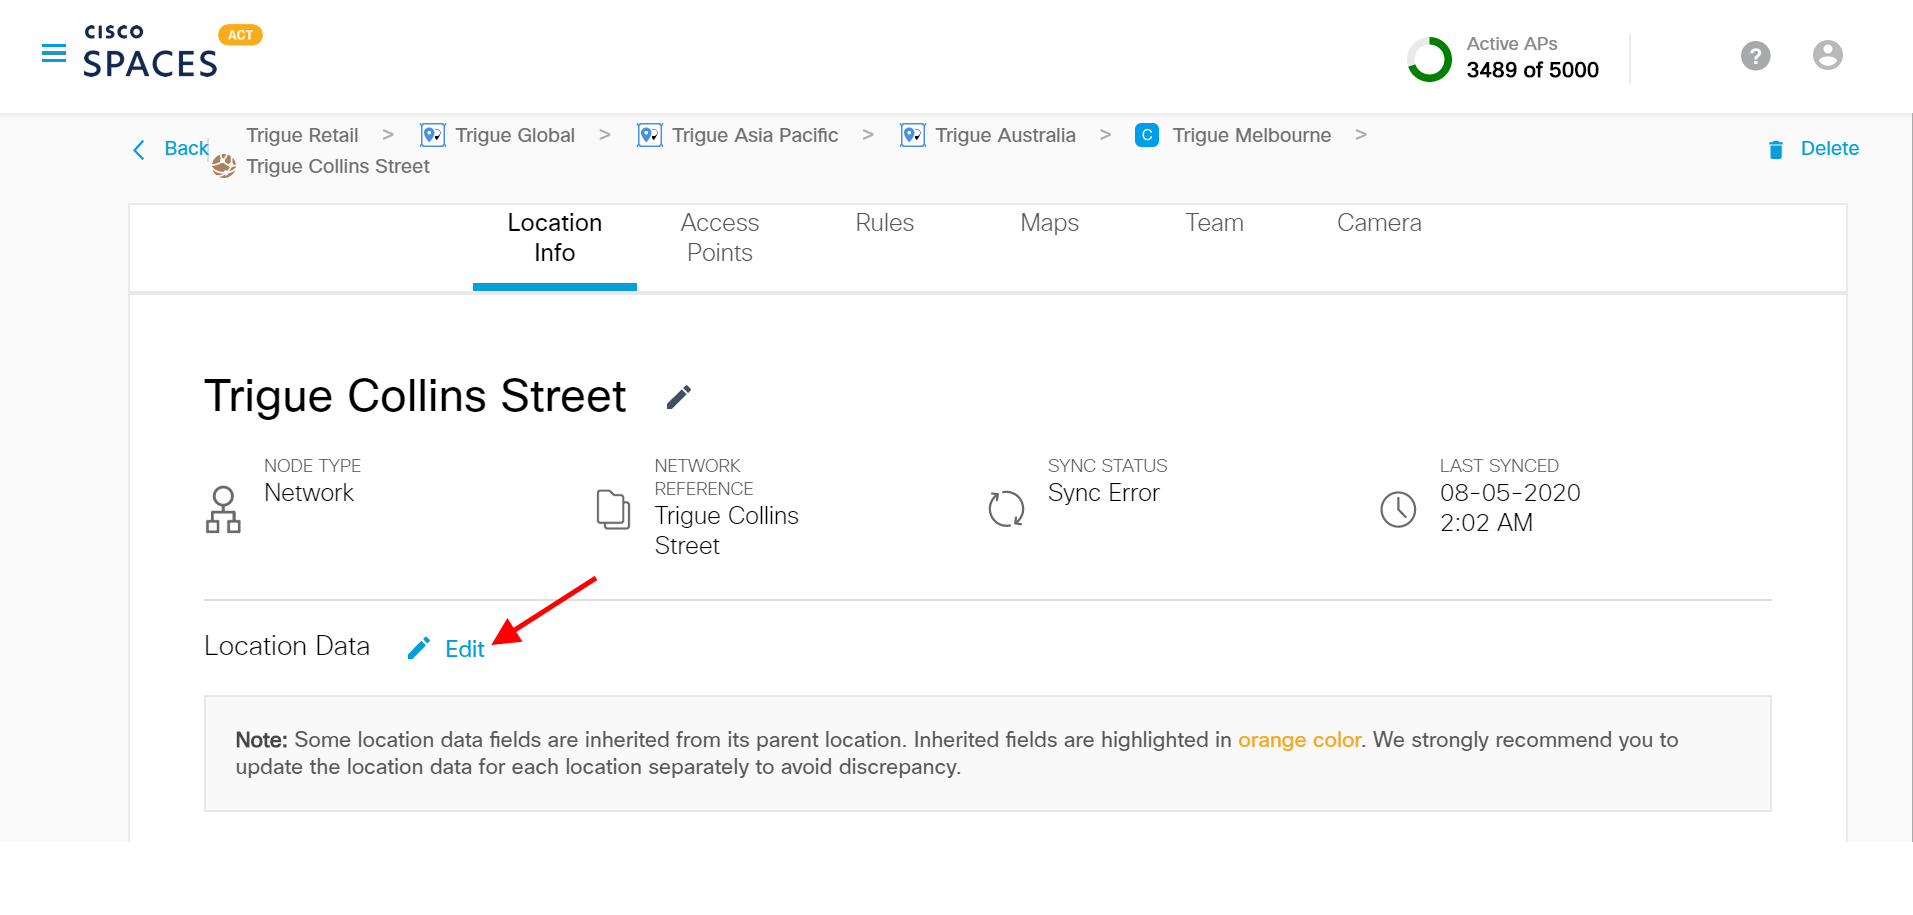
Enter Location Info such as Brand Name, Country, City, Address, Timezone, area units in Sq. Ft/Sq. Mt and click Update.
