Best Practice is to use Spaces Connector
Reasons to deploy the Spaces connector:
Ensuring all licenses are being utilized
To get the most value out of Cisco Spaces, you will want to ensure all of your licenses are being utilized. Maximizing the number of Access Points that are feeding data into spaces will increase the accuracy of Spaces’ applications
To consume your licenses, you must add controllers. For a step by step, refer here
Ensure Maps are uploaded (If applicable)
If you currently use DNAC / Catalyst Center or Prime and have created maps in those applications, you will want to import those maps into Cisco Spaces. This will allow for the Spaces location engine to calculate an X,Y of an asset or client, and visualize location on top of your map.
To Import maps from Prime:https://spaces.cisco.com/setupguide/import-prime-maps/
To import maps from DNAC/Catalyst Center: https://spaces.cisco.com/setupguide/import-maps/
Create Roles
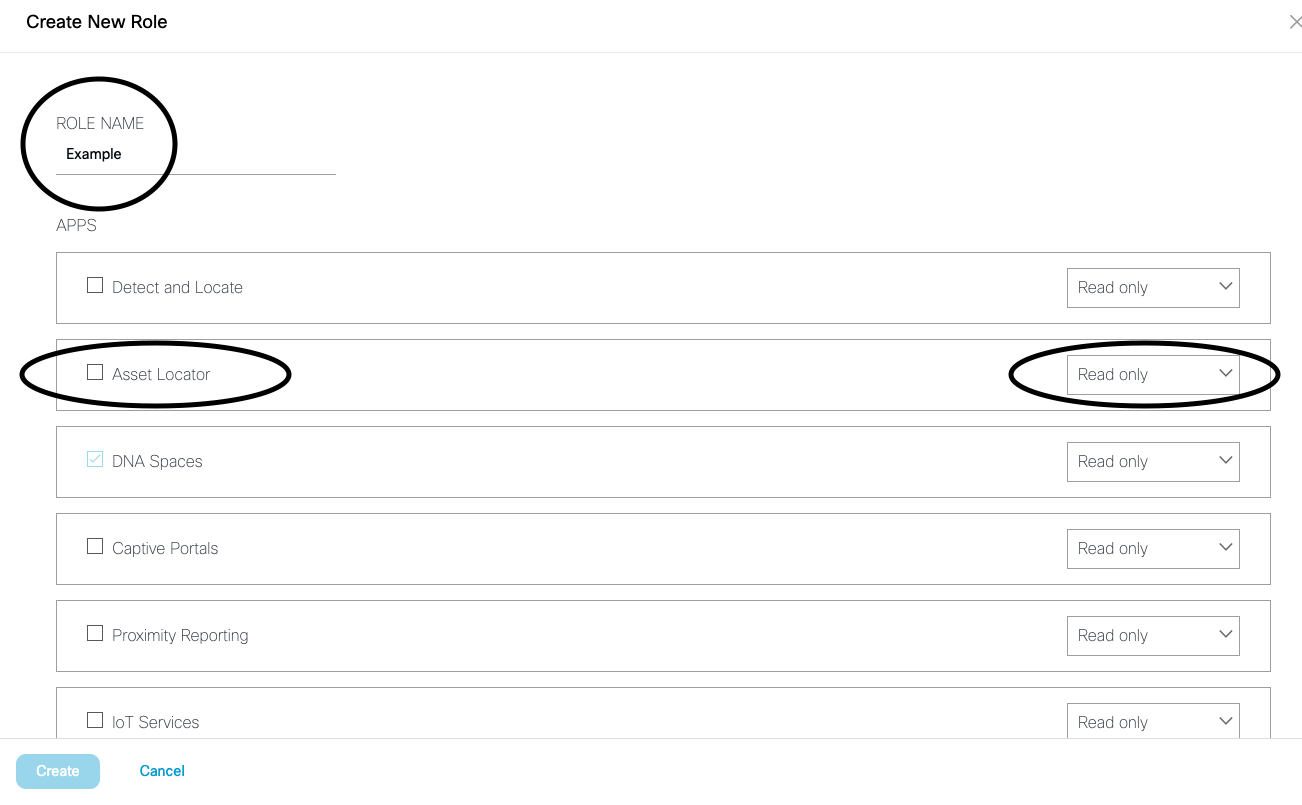
In Spaces, you can create roles to assign to Users in your tenant. This allows users to only have access to specific applications / locations in your Spaces tenant. You also have the ability to configure ‘Read Only’ or ‘Read / Write’ permissions for applications for a specific Role.
WHY ITS IMPORTANT: Customers see the most value out of Cisco Spaces when multiple business units utilize the platform. There are specific Line of Business (LoB) users who will benefit from access to Spaces but will only need access to 2 or 3 applications & under limited permissions.
For example:
Operations & Clinical teams can better track mission-critical equipment/assets in real time using IoT Explorer, Detect & Locate, and asset locator
Facilities teams can use Cisco Spaces to understand how employees are interacting within the workspace in a hybrid work environment using Right Now, Space Manager, and Space Utilization
Marketing teams can gain valuable insights from Spaces such as identifying and segmenting their customer base and enabling automatic messaging to customers in their locations using Captive Portal, Location Personas, and Engagements
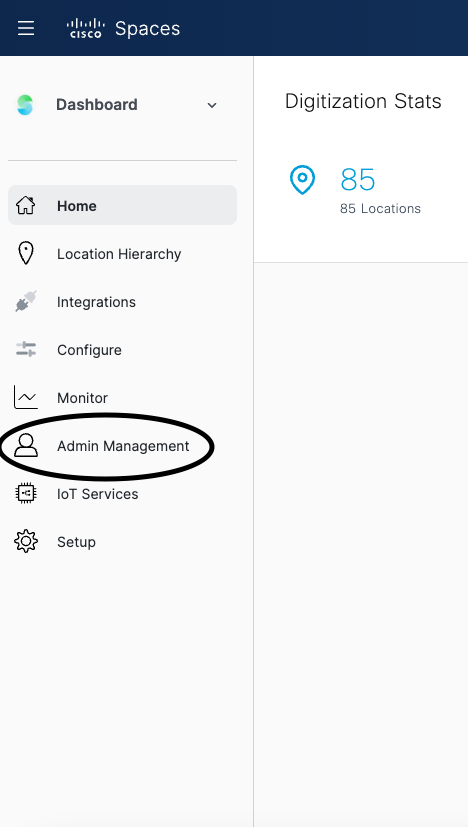
To Create Roles:


Add Users
Adding new users to your Spaces tenant is an easy process. When adding users, you are able to assign them to a Role you have created as well as restrict a new user’s access to specific locations within your location hierarchy. Cisco Spaces is an unlimited user platform and there are no restrictions to the amount of users you can add.
Location Hierarchy
Location Hierarchy feature enables you to organize your network view within Cisco Spaces based on your physical locations and access point deployments. You can organize the hierarchy based on specific brands, regions, campuses and other taxonomies that are relevant for your business.
By translating your IT network view into a business view, you are automatically presented with a cleaner business relevant insights report. Any changes to your network topology are automatically reflected here thereby making it easy to manage.
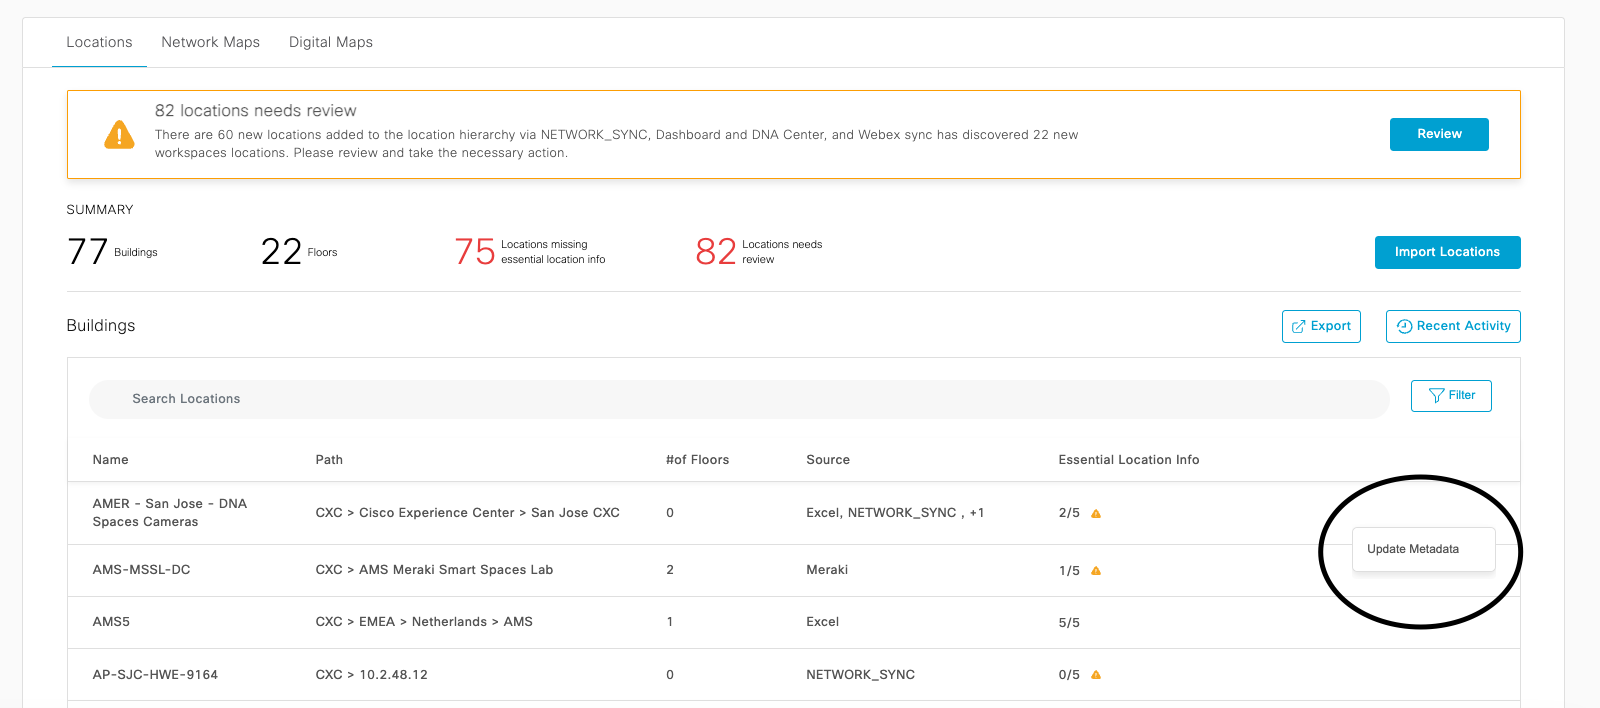
Metadata (time zones, capacity, sqft).
It is important that you update the metadata for your locations once they are loaded into Spaces. By setting time zones, capacity, and square feet, you can:
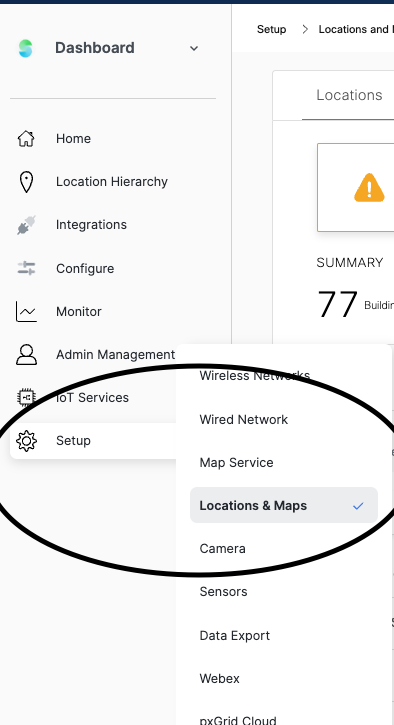
To update this information for your locations, follow these steps:


Set Vertical on Account
By setting your Vertical on your Account, you are able to compare your Occupancy to Industry trends.
Currently you can choose between ‘Retail’, ‘Workspace’, or ‘Education’ as your vertical
To Set your Vertical on your Account – please open a support ticket:
Note: Need assistance with setup hygiene? Please reach out to spaces@cisco.com